
For many organizations, Jira powers tech development while Wrike supports business and project management. Yet, running two platforms without an integration often creates challenges:
- duplication of work,
- inconsistent status updates,
- communication gaps between teams operating in different areas.
A Wrike integration with Jira resolves these pain points by enabling two-way sync between the tools. Whether your goal is to automatically create Wrike tasks from Jira work items, streamline reporting, or improve collaboration across departments, the integration provides a unified workflow.
In this guide, we’ll explore why Jira-Wrike integration matters, use cases, setup prerequisites, step-by-step no-code configuration with Getint integration platform, and learn about best practices for maximizing the values.
Why Sync Wrike with Jira Projects?
Although both tools are project management solutions, they serve different audiences:
- Jira → preferred by software teams, developers, and QA engineers for tracking bugs, issues, and structured workflows.
- Wrike → widely used by project managers, operations, and other units to manage campaigns, folders, and cross-departmental projects.
Without a Wrike Jira integration, organizations face:
- Challenging communication between users.
- Duplication of data across projects.
- Delayed updates when transferring tasks manually.
- Limited insights for top companies that rely on precise reporting.
By connecting Jira and Wrike, you:
- Enable Wrike sync with Jira to provide real-time context.
- Automatically mirror and update Wrike tasks when new work items appear in Jira.
- Track dependencies across two platforms without losing data.
- Deliver better reporting.
Common Use Cases for Jira Wrike Integration
Connecting tools unlocks workflows that leads to great collaboration:
1. Project alignment across the tools
A manager works in Wrike workspace to manage deliverables, while engineers rely on Jira possibilities. With integration, new work items in Jira are synchronized with objectives created in Wrike, ensuring progress is transparent across departments.
2. Automatically create Wrike tasks from Jira
When developers log a bug in Jira, the integration can automatically prepare a corresponding action in Wrike, complete with description, comments, attachments, and status. This reduces manual transfer and ensures customers or business teams stay informed.
3. Two-way sync for consistent reporting
When syncing Wrike with Jira, updates made in either system are reflected across both systems. Description change in Wrike is visible in Jira, while a status update in Jira automatically updates Wrike.
4. Incident management and response
For incidents reported in Wrike by support or business users, integration ensures they are logged in Jira for technical resolution. Once resolved, Wrike is updated so customer-facing teams can act quickly.
5. Migration
Organizations moving data from Wrike to Jira or vice versa can use the integration to log, track, and backfill historical tasks. This ensures values and parameters remain intact during transition.

Integration Options Available
Teams that want to connect Jira and Wrike typically explore three main paths, depending on how deeply they want tools to work together.
Built-in Wrike Integrations
Wrike comes with a range of built-in integrations that let you connect to external tools. When paired with Jira, these usually allow you to set up basic automations—for example, creating tasks from Jira items, or sending notifications when something changes in one platform.
This option is quick to configure and can be useful for small teams. However, limitations appear when scaling: you can’t achieve true two-way combination, advanced field mapping, or granular control over what gets synced. For larger organizations, this often means duplicated data, inconsistent updates, and extra manual effort.
Third-Party Integration Tools
Another option is to use third-party integration tools. These typically offer more functionality than the built-in Wrike connectors, such as the ability to map fields more flexibly or apply some filters to manage the sync. They can be a step up for companies that need better collaboration across two platforms, but they may still fall short on enterprise-grade security, complex workflow customization, or large-scale scalability.
Getint Jira–Wrike Integration
Getint’s Jira–Wrike integration takes things further by offering a dedicated, purpose-built connector. Unlike general-purpose tools, it is designed specifically to keep Jira projects and Wrike workspaces in sync.
With Getint, you can:
- Enable real-time two-way connection across both tools.
- Customize connections by mapping Jira work item types to Wrike tasks, and aligning fields like descriptions, attachments, comments, status, etc.
- Apply filters so only the most relevant objectives are synchronized.
- Support both Jira Cloud and Jira Data Center, along with large, complex Wrike environments.
- Maintain enterprise-level security through API-token authentication and compliance with ISO and GDPR standards.
And importantly: Getint is available directly on the Atlassian Marketplace, making it easy for existing Jira users to install, verify, and manage the integration securely. Among Jira and Wrike connector, the platform enables to connect many business tools like Asana, Clickup, GitHub, Servicenow, etc.

Prerequisites for Setup
Before starting, make sure you have the following:
- Jira Cloud or Jira Data Center access with admin rights.
- Wrike account with permissions to configure integrations.
- API token from both tools for secure authentication (you can also generate them while the setup).
- Defined integration goals: decide if you need one-way sync, two-way sync, or migration.
- Consider which work item types/tasks should be synced.
Step-by-Step Setup for Wrike Jira Integration
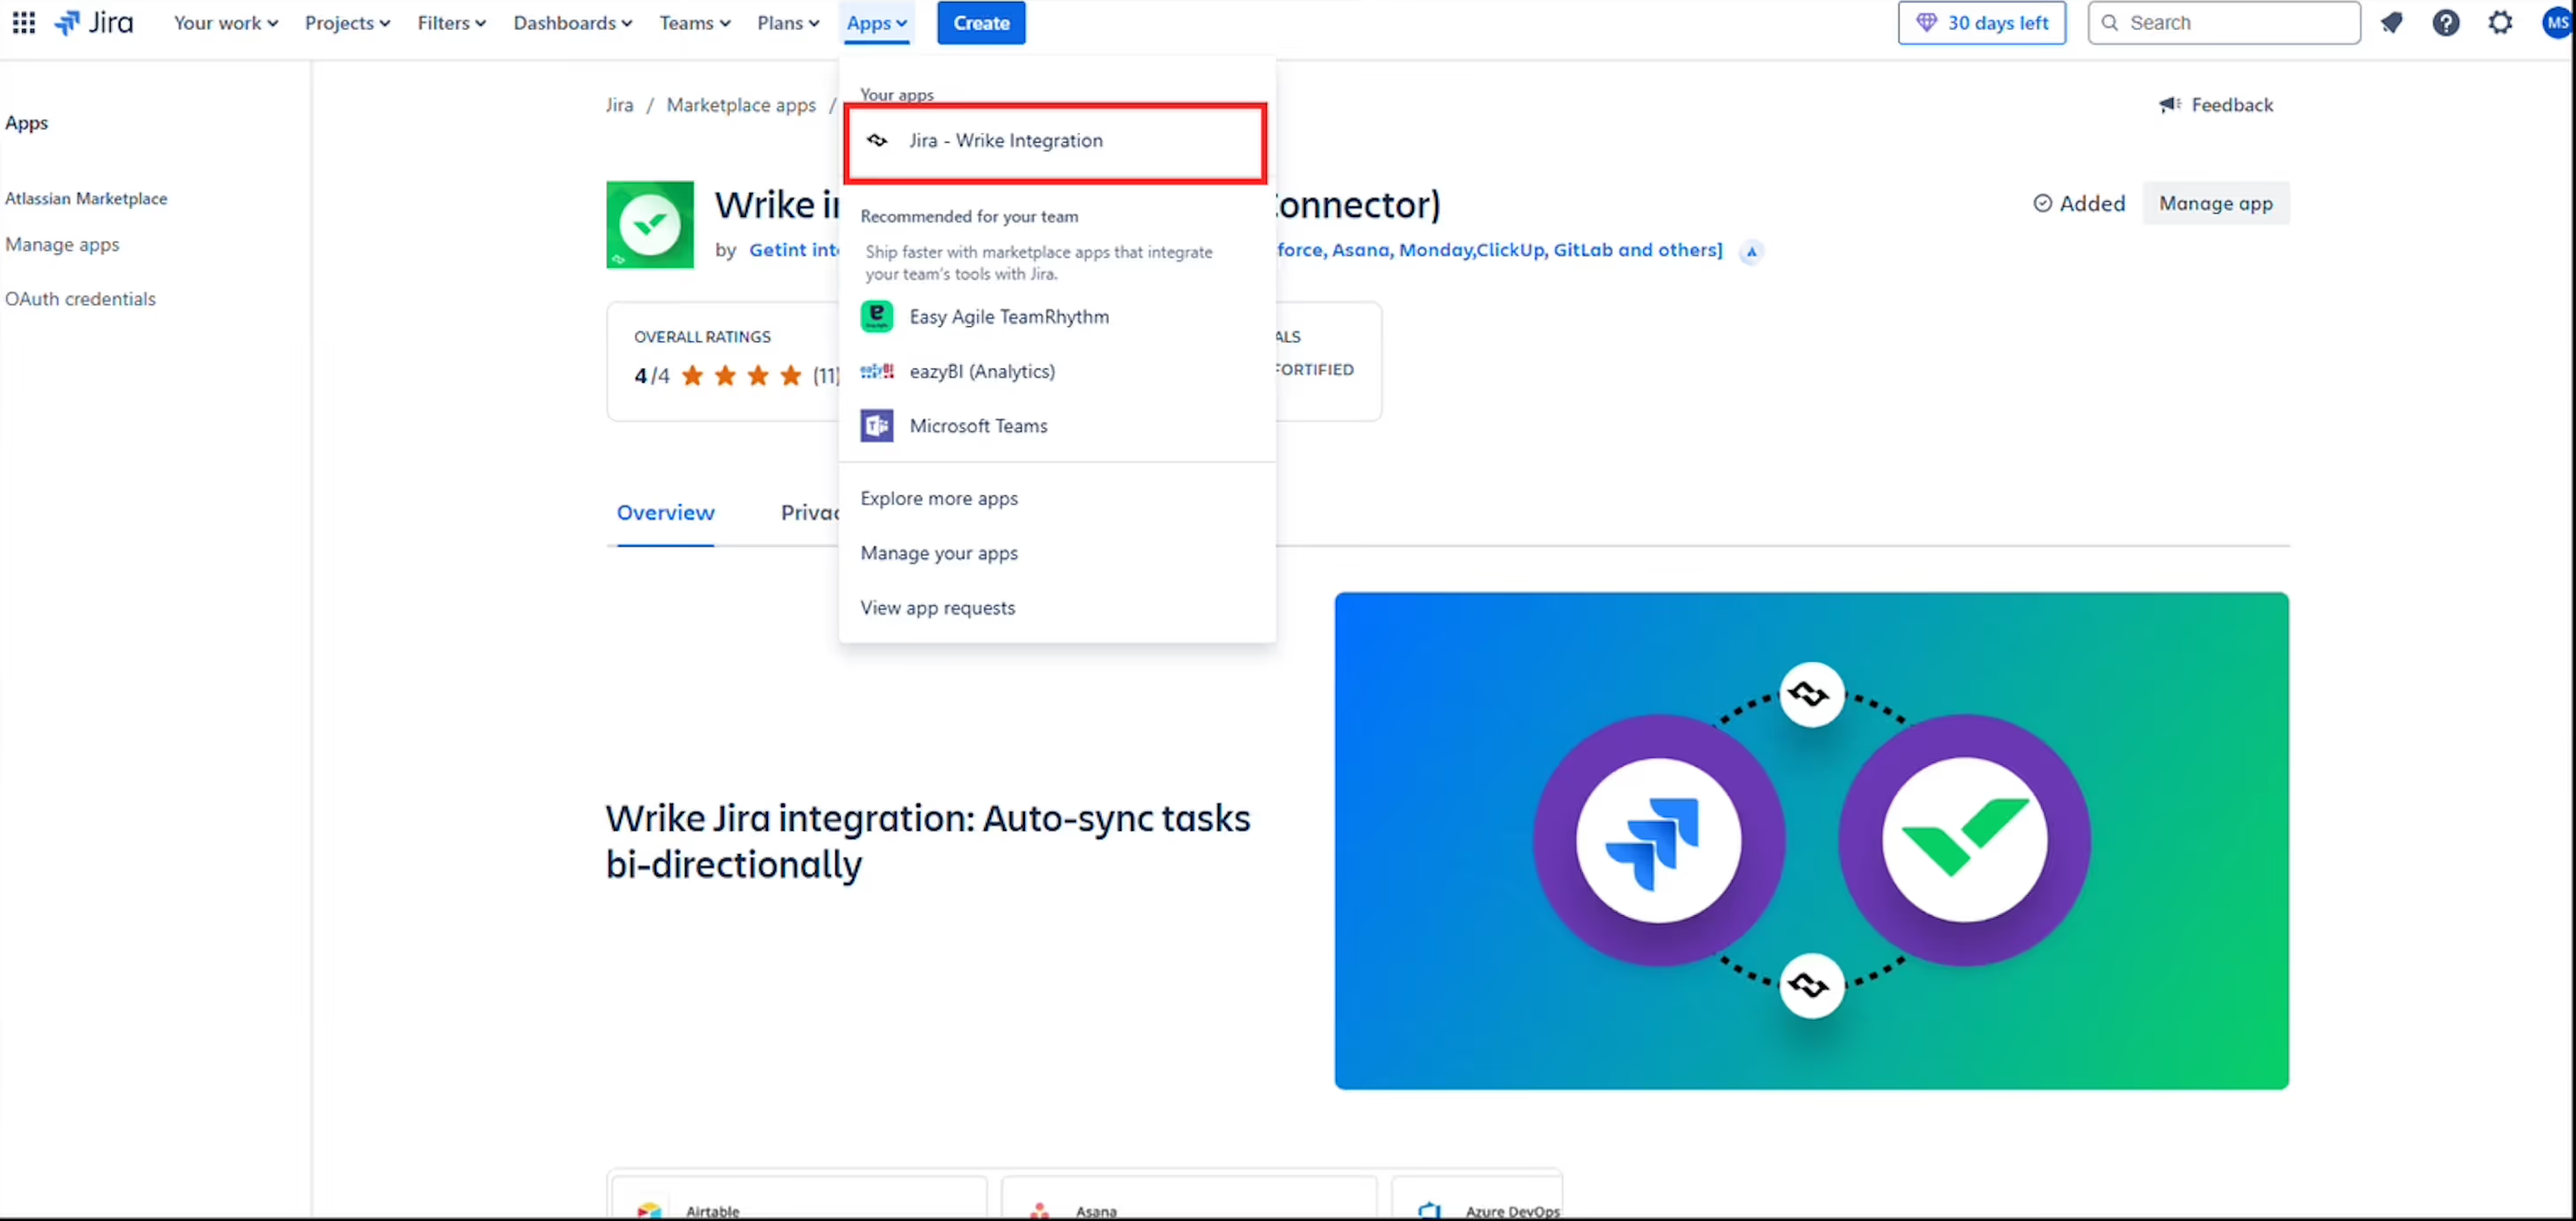
Step 1: Install the App
Head to Atlassian Marketplace and install the Getint Jira Wrike integration app. Then you can navigate to the Apps inside Jira and select already installed app.
Step 2: Choose between data migration and continuous synchronization
From now, you can choose between Continuous Sync or Migration basing on your needs.

Step 3: Generate tokens
For Jira Cloud:
You can generate token heading to Account Settings > Security. Don't forget about copy and securely store your token.
Detailed information about establishing the connection between tools, you can find here.
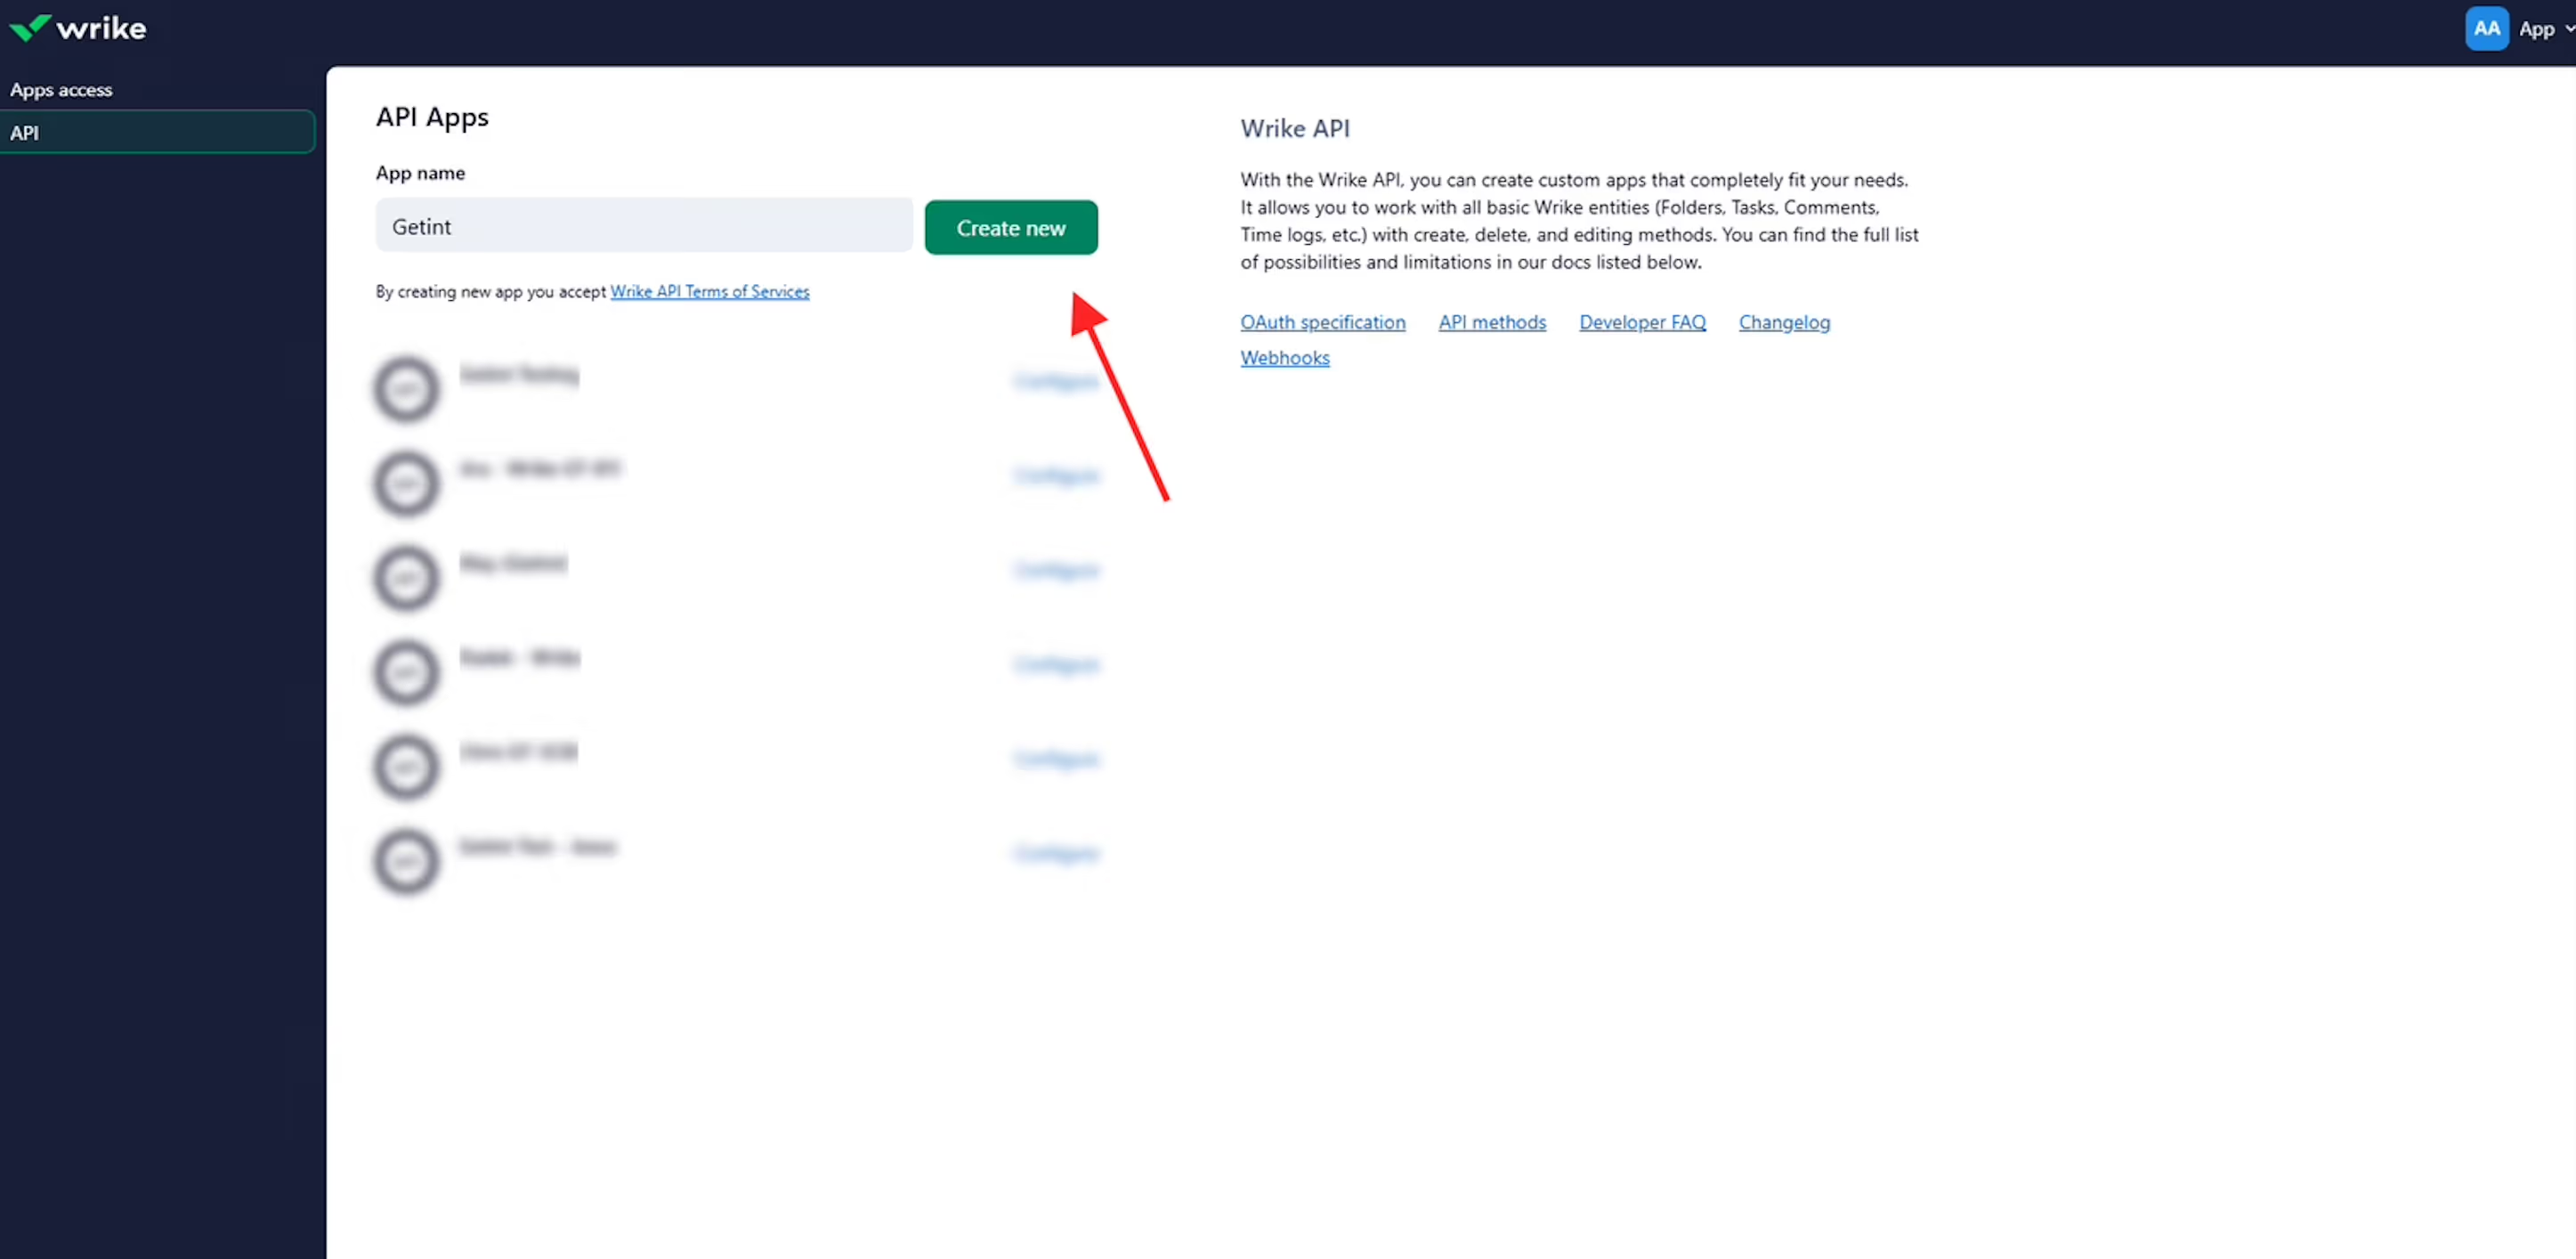
For Wrike:
Sign in with your Wrike account credentials. You will need to verify your account if API settings are unavailable: Account Settings > Apps & Integrations > API Access. Generate a permanent token and establish the connection to your Wrike environment.
Step 4: Integrate Jira-Wrike
Now you can establish connection.
For Jira:
- Enter Jira instance URL, name connection, enter your username, and token.
- Select the project you want to synchronize.
For Wrike:
- Use the permanent access token to connect Wrike.
- Select the workspace and folder you wish to refer to Jira.
Click Save to ensure the bond is created.
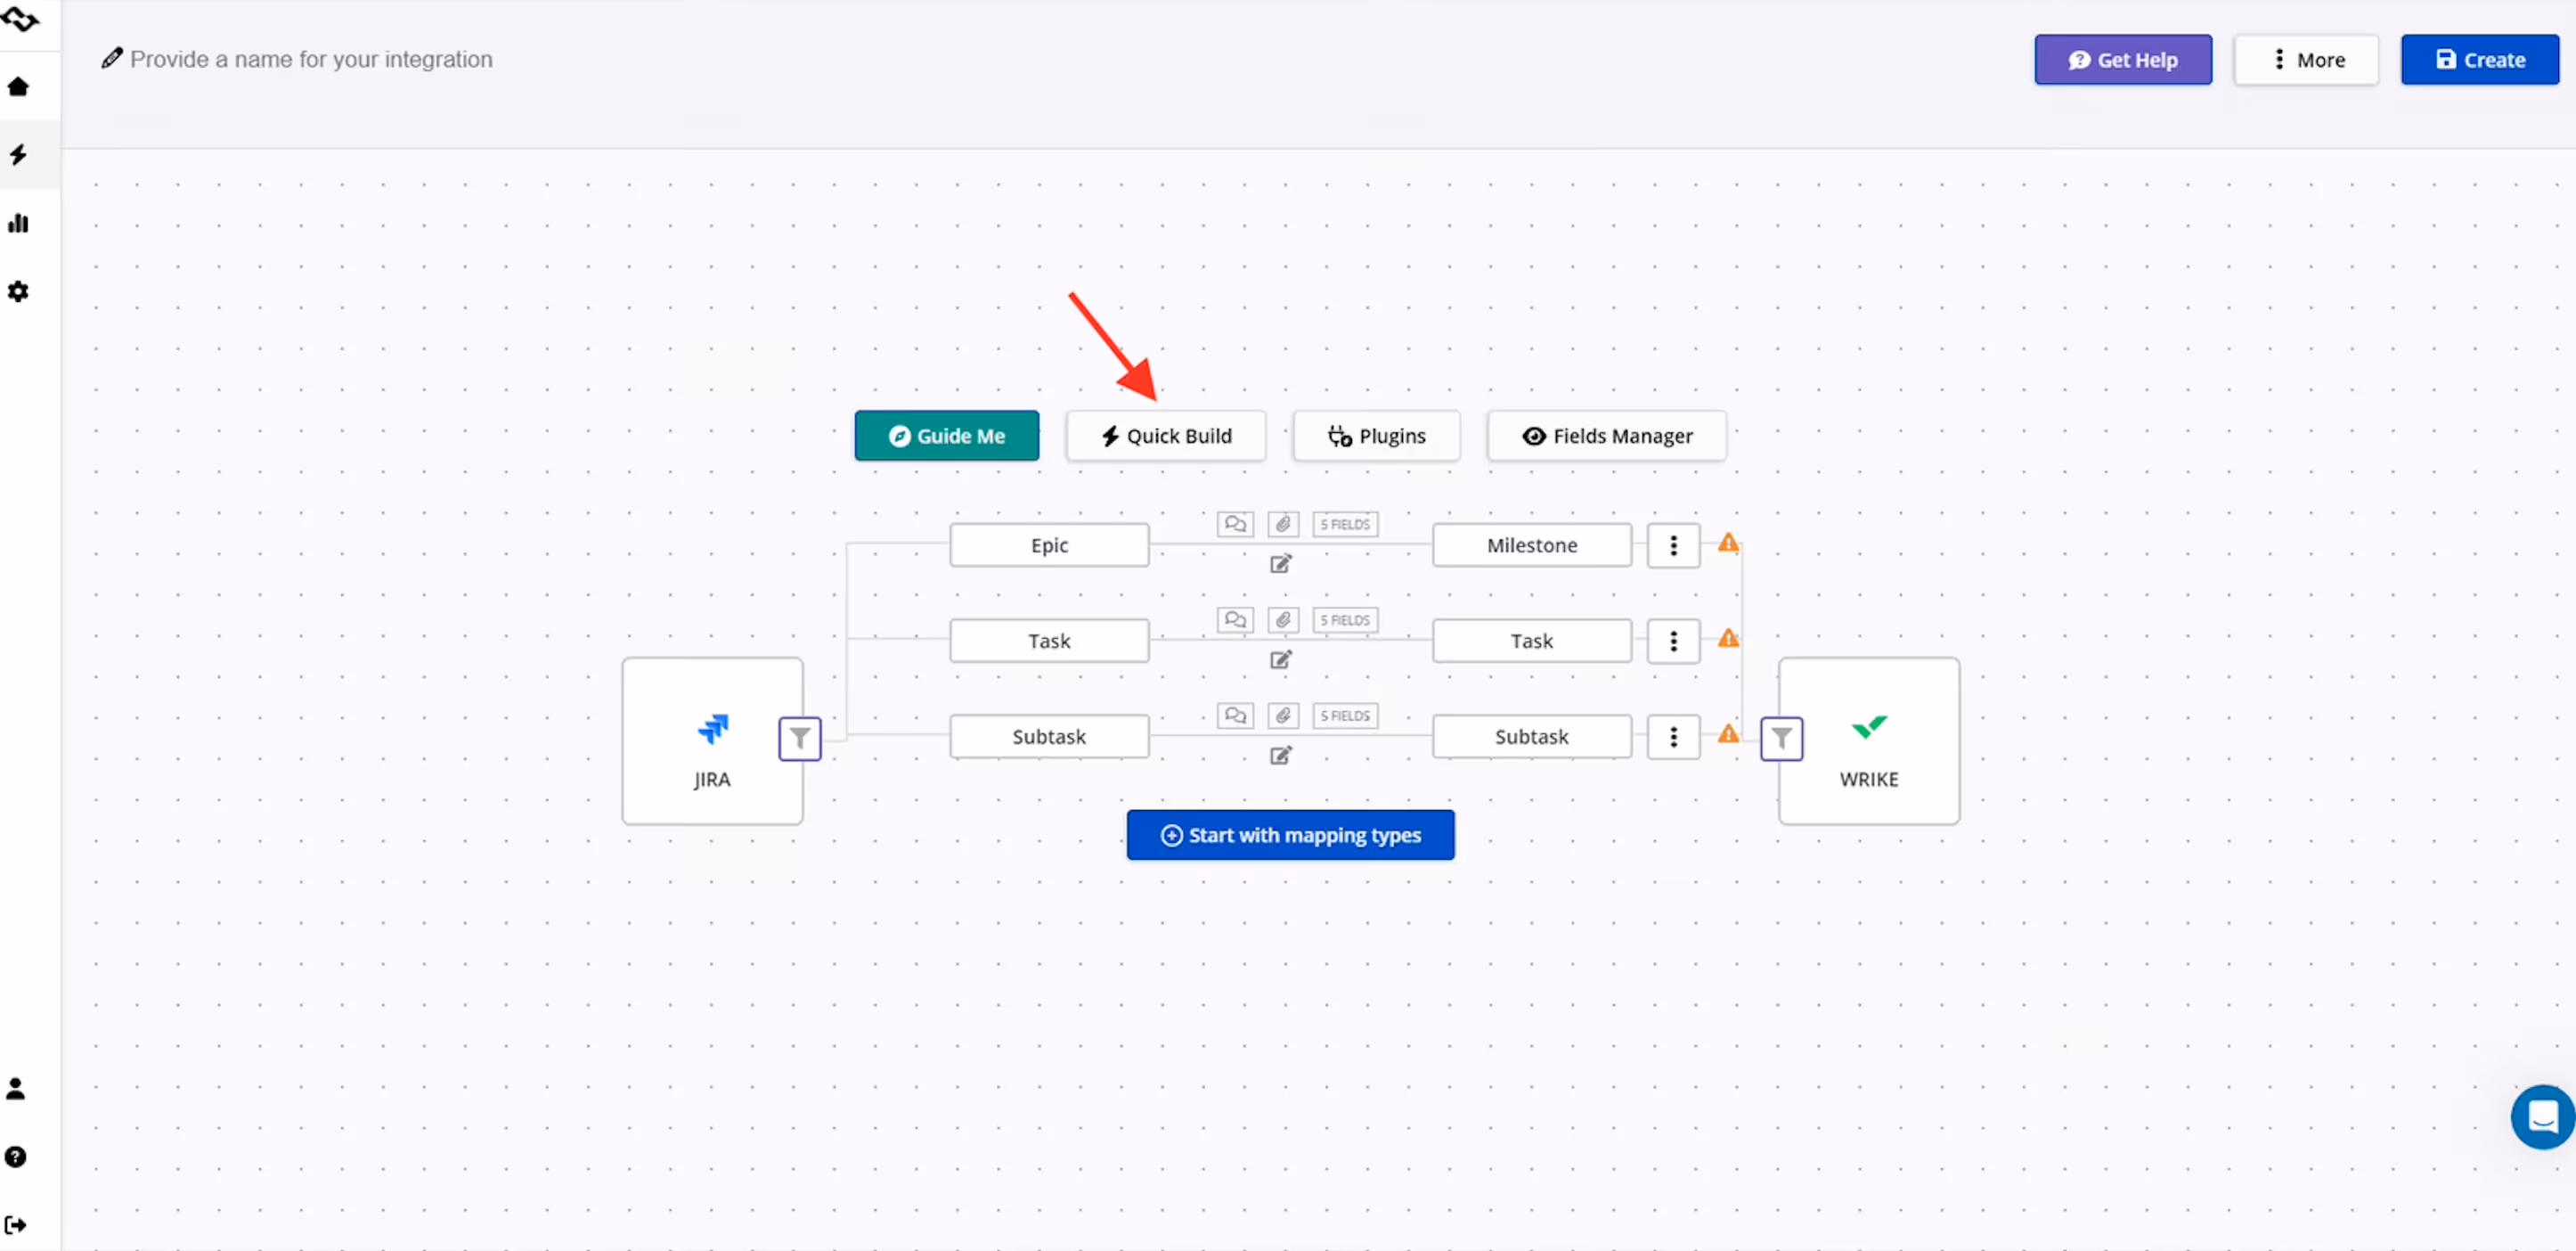
Step 5: Configure Type Mapping
Map Jira work item types (e.g., Bug, Story) to corresponding tasks in the second tool. Consider using Quick Build option that helps going through this step up process.
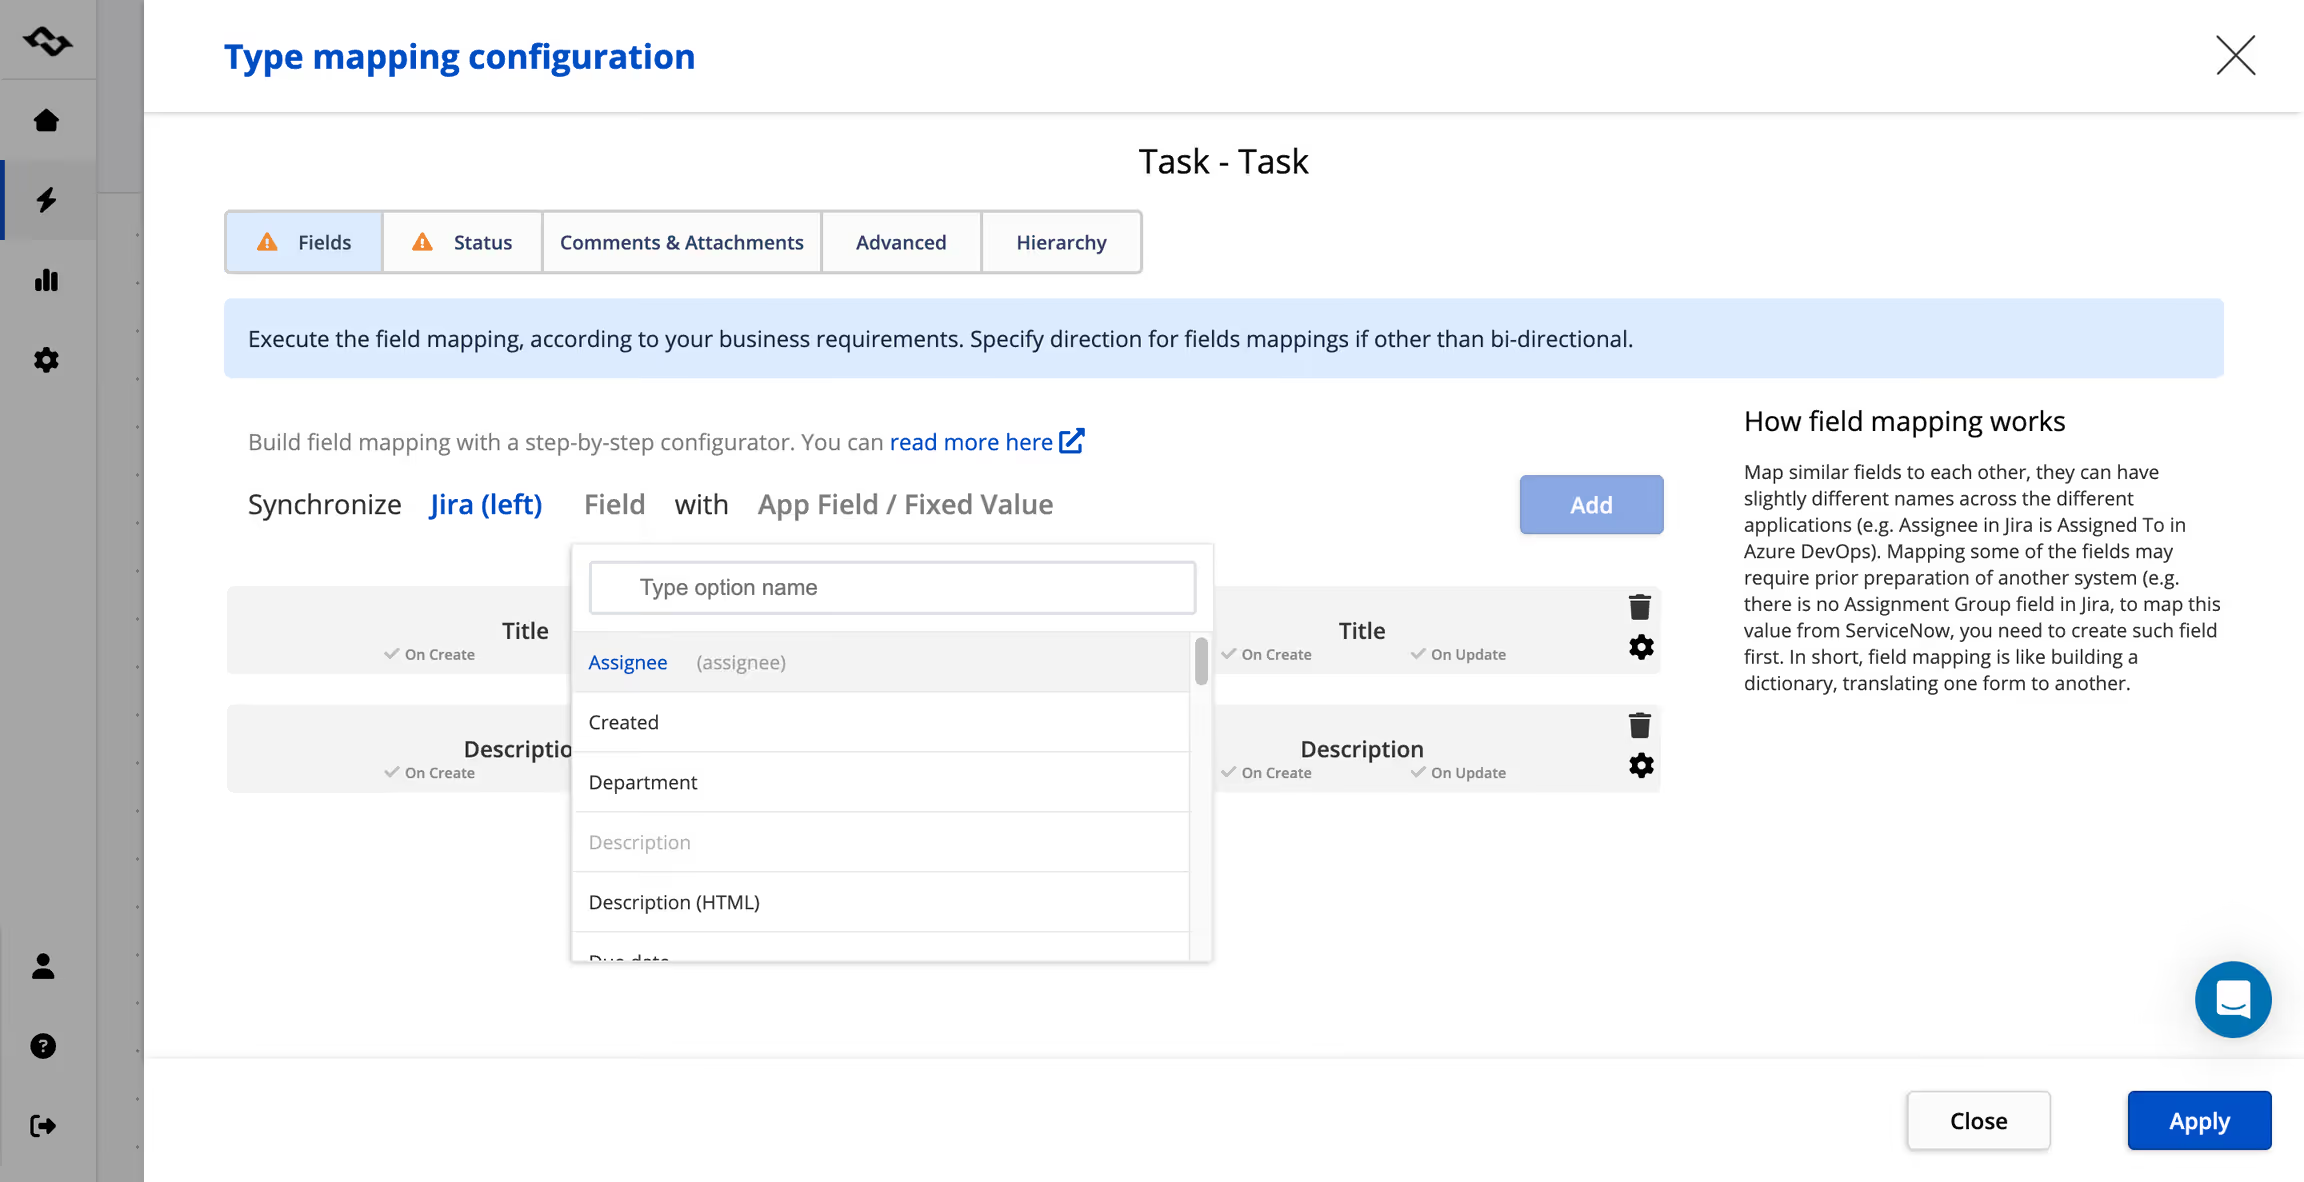
Step 6: Configure Field Mapping
Define what fields need to correspond with each other such as title, description, assignees status, etc., or custom fields.
Choose in which direction do you want the objectives to correspond:
- Unidirectional: Synchronize changes from one platform to another.
- Bidirectional: Synchronize updates in both directions.
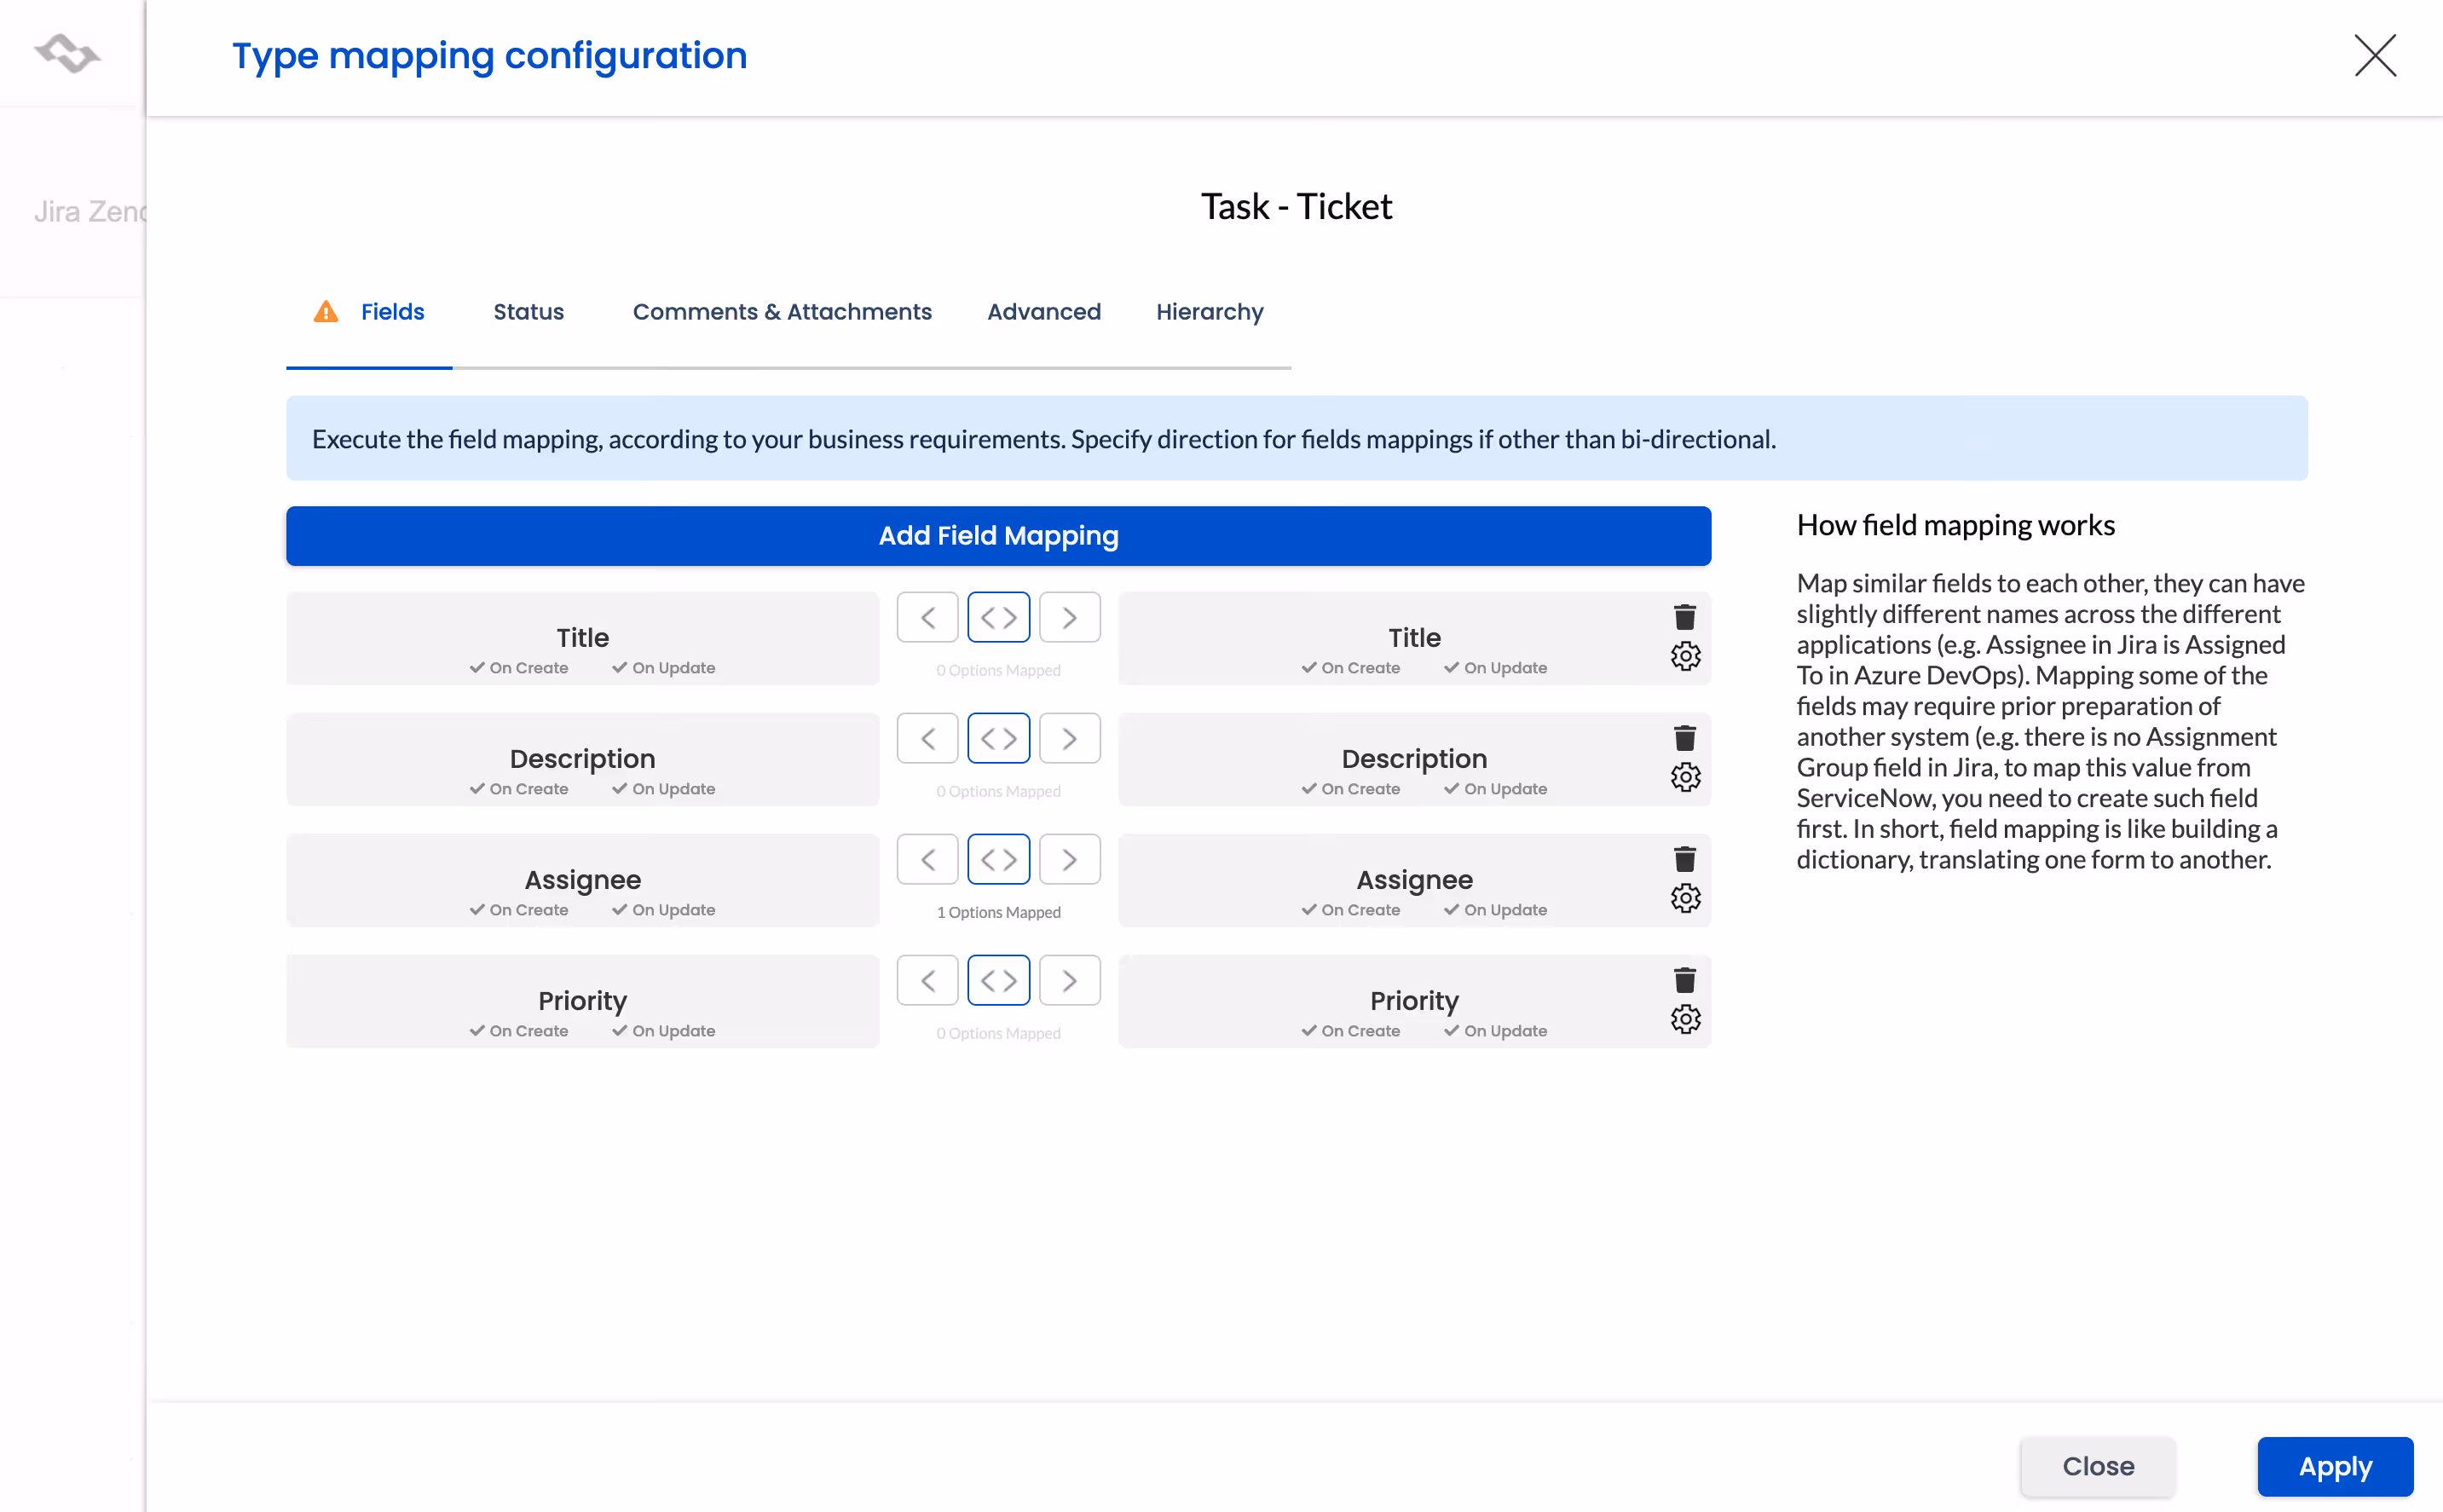
Click Apply to save the settings.
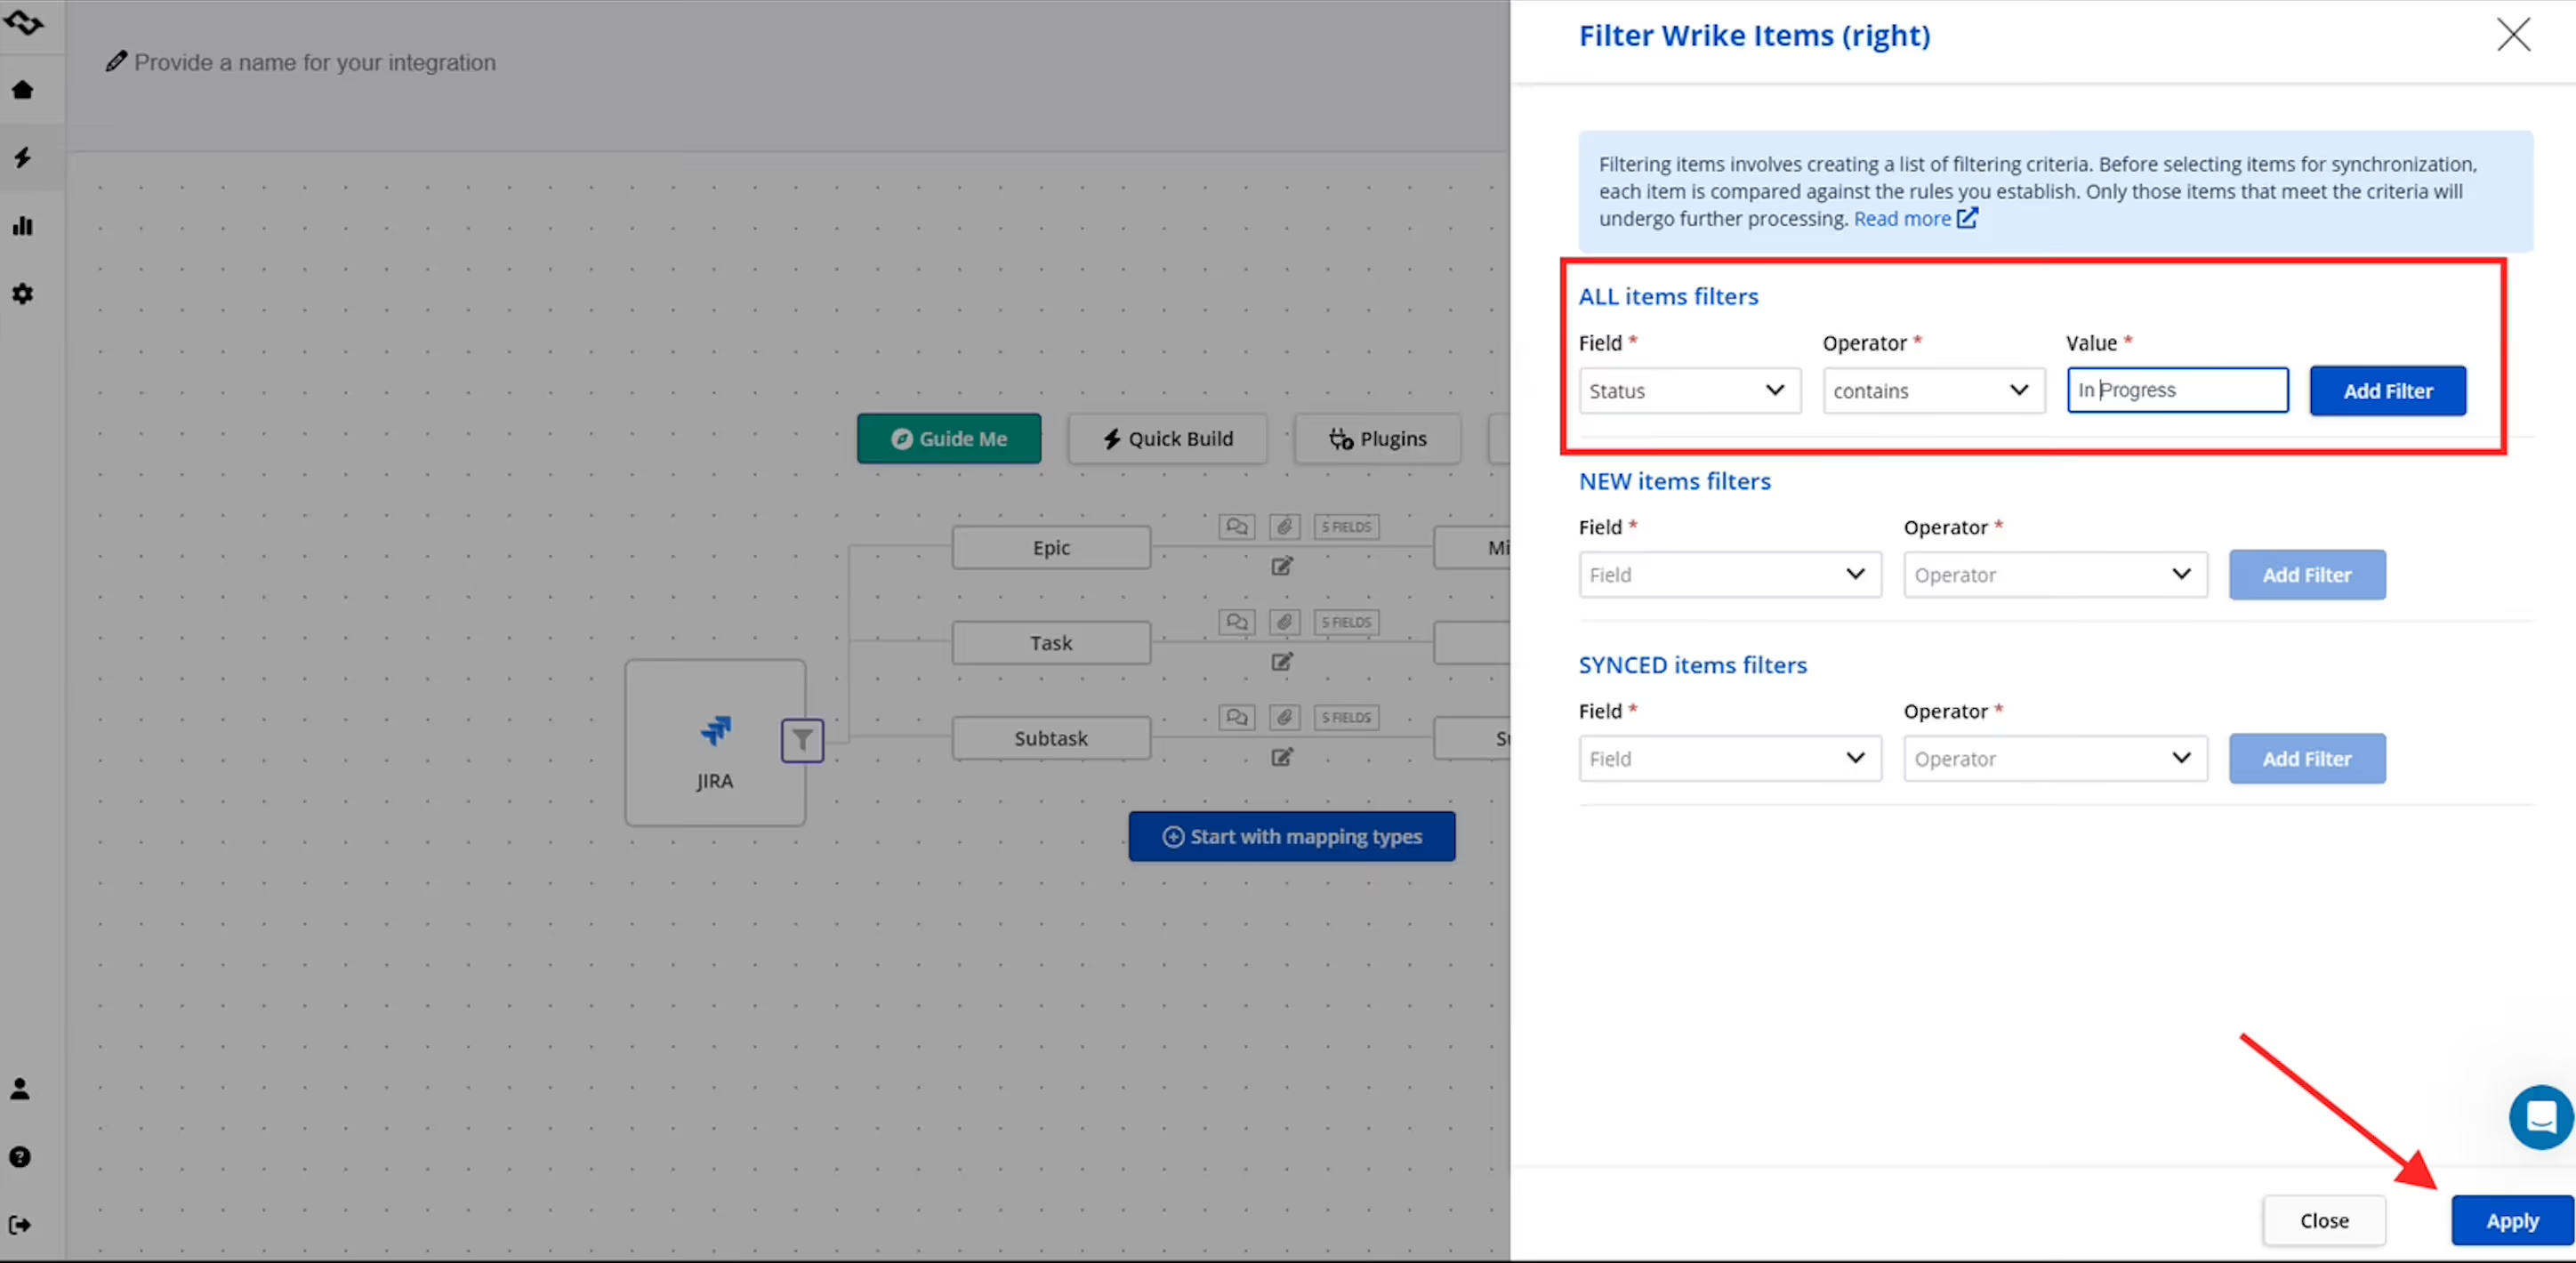
Step 7: Apply Filters
Filtering lets you customize the synchronization. For example, you can decided to sync only new work items with a certain label, or only tasks in a specific folder. Choose between:
- All - apply filtering to all items.
- New - apply filtering only to newly created items.
- Synced - apply filtering to already synchronized items.
For more detailed information about filtering, visit our documentation.
Step 8: Test the Integration
Run a pilot project. Create a task in Wrike and verify it appears in Jira. Update a Jira work item and confirm it syncs with Wrike.
Step 9: Roll Out Across Teams
Once tested, extend the integration across multiple projects and teams.
Best Practices for Jira Wrike Integration
Getting your Jira Wrike sync up and running is only the first step. To truly get value from connecting two platforms, it’s important to approach the setup strategically. The following best practices will help you avoid common pitfalls, keep your data clean, and ensure both technical and business teams stay aligned over time:
- Start small: Test with one Jira project and one Wrike folder.
- Use filters: Don’t sync everything — only the most relevant.
- Automate updates: Set two-way integration to reduce manual effort.
- Maintain security: Always use service accounts and keep your API tokens safe.
- Customize workflows: Adjust options to reflect how your teams deliver work.
- Monitor regularly: Review sync logs and reports to verify consistency.
Key Benefits of Jira and Wrike Integration
Integrating Jira and Wrike is more than just a connection between two platforms. It’s about unlocking smoother communication and better outcomes. By bridging two platforms that serve different types of users, companies gain efficiency, visibility, and stronger control over their projects. Some of the most impactful benefits include:
- Aligns technical and other teams in real time.
- Improves communication and collaboration across departments.
- Reduces manual updates by automating task creation and updates.
- Unifies the source of truth for project managers and executives.
- Enhances workflow security with API-based authentication.
Conclusion
The Jira Wrike integration creates a seamless bridge that serve different but equally important teams.
- Use Wrike for business and project management.
- Use Jira for technical tracking and software development.
- Connect them with Getint’s integration app to enable two-way communicating, improve visibility, and reduce manual updates.
By synchronizing Wrike and Jira, your organization can better manage projects, track them, and deliver results faster across two platforms.