
When your support teams live in Freshdesk and your development teams thrive in Jira, sooner or later you’ll face the same challenge every growing business encounters:
How do we keep customer requests, bugs, and feature requests flowing smoothly between both platforms—without losing time, context, or sanity?
That’s where a Freshdesk integration with Jira steps in. Done right, this setup doesn’t just move data—it builds a bridge between your support agents and engineering team, enabling faster responses, clearer collaboration, and efficient issue resolution.
In this guide, we’ll walk you step by step through how to set up a Jira Freshdesk integration using the Getint integration platform. Whether you’re working with Jira Cloud or Jira Service Management, or even Jira Server, you’ll get the clarity you need to bring both tools into perfect sync.
Freshdesk Jira Integration: Why It's Worth Connecting Them at All
Think about your support teams. They’re handling a flood of customer requests, troubleshooting issues, and answering questions in Freshdesk tickets every single day.
Now picture your Jira team—developers managing sprints, fixing bugs, and building features inside Atlassian Jira. Without an integration, these two worlds communicate in fragments: copy-paste emails, Slack pings, or endless forwarding.
The result? Lost context, duplicated work, and delayed updates.
With a Freshdesk integration, you can:
- Create Jira issues directly from Freshdesk tickets.
- Sync Freshdesk tickets with corresponding Jira issues so nothing falls through the cracks.
- Keep both support agents and engineers updated through status sync, comments sync, and notifications.
- Map key Freshdesk fields with Jira fields to ensure all the right data travels in both directions.
In short: this integration enables agents to focus on customer conversations while developers resolve issues without leaving Jira. Everyone works in their comfort zone, but both sides stay aligned.

What You’ll Need Before You Start
Before we dive into the steps, let’s get your checklist ready:
- An active Freshdesk account with admin permissions.
- Access to your Jira project (Cloud, Server, or Data Center).
- An API key from Freshdesk.
- The Jira integration app by Getint, available in the Atlassian Marketplace.
- A clear plan for which custom fields and workflows you want to sync.
Once you’ve got these in place, you’re ready to go.
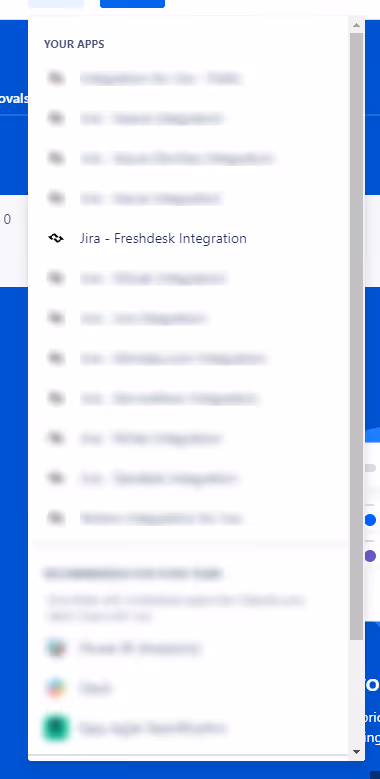
Step 1. Install Freshdesk and Jira Integration App
First things first: head over to the Atlassian Marketplace and install the Jira Freshdesk integration app by Getint.
This app acts as the connector between your Freshdesk account and Jira. Once installed, you’ll see the integration menu inside Jira.
Pro tip: You don’t need to install anything in Freshdesk itself—the Jira app is enough to make the integration work.
Step 2. Connect Your Freshdesk Account
Now let’s get Jira and Freshdesk talking.
- Go to the Getint integration settings in Jira.
- Enter your Freshdesk URL.
- Add your API key (you’ll find it in your Freshdesk profile settings).
- Test the connection to confirm everything is linked.
At this stage, you’ve essentially built the handshake between systems. From here, you can begin customizing how the sync will behave.
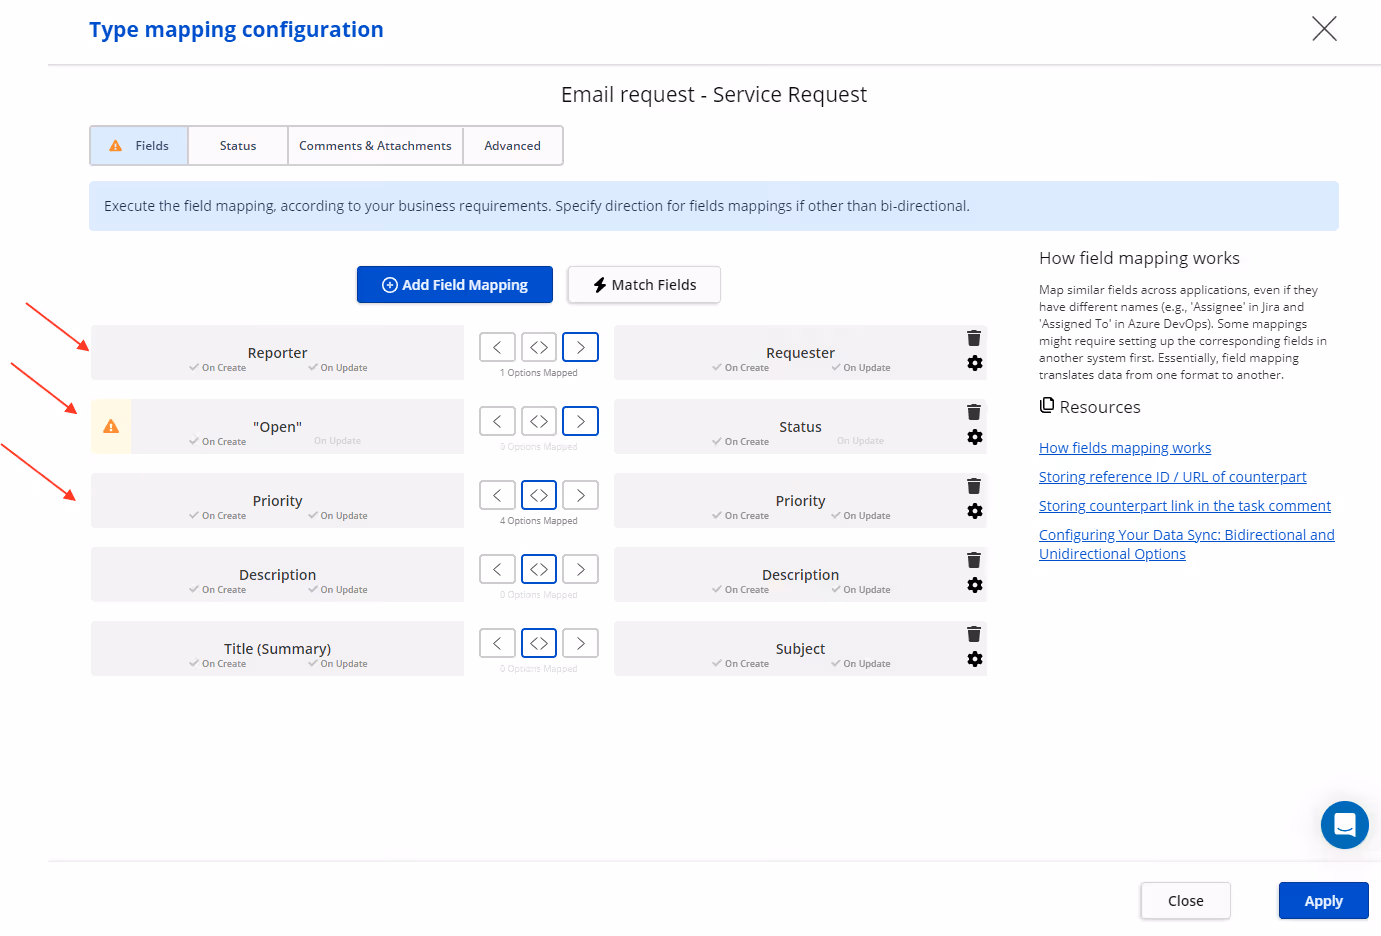
Step 3. Define Your Integration Rules
The magic of Getint lies in its flexibility. Instead of a one-size-fits-all setup, you can shape the integration to match your workflow.
Here’s what you can configure:
- Direction of sync – one-way (Freshdesk to Jira) or two-way (keep everything aligned).
- Objects to sync – choose whether you want to create new Jira issues from Freshdesk tickets, link to an existing Jira issue, or both.
- Fields mapping – map Freshdesk fields with all the Jira fields you care about, including custom Jira text fields, assignee custom fields, and more.
- Status sync – align status changes so everyone sees progress instantly.
- Comments sync – keep customer conversations visible for developers and engineers.
By setting these rules, you control whether you’re syncing only feature requests, bugs, or every type of customer ticket.
Step 4. Create and Sync Jira Issues from Freshdesk Tickets
Once your rules are in place, here’s how the workflow looks in practice:
- A customer opens a Freshdesk ticket.
- Your support agent identifies it as a bug or enhancement.
- In Freshdesk, they click the Create issue tab to generate a Jira ticket.
- Depending on your rules, the issue is either linked to an existing Jira task or logged as a brand new one.
From that moment, both the Freshdesk and Jira worlds stay in sync: comments, statuses, and key fields update automatically.
This way, your engineering team has direct visibility without ever logging into Freshdesk, and your agents don’t have to chase developers for updates.
Step 5. Fine-Tune Your Settings
Every organization has unique needs, and Getint’s app lets you adjust until the setup feels just right.
You can:
- Decide which custom fields should sync.
- Configure send notifications to alert the right people.
- Test with a few existing Freshdesk tickets before rolling out company-wide.
- Apply default settings for new projects or tailor rules for specific workflows.
The key is to start small—sync a handful of tickets, test how multiple Jira issues behave, and gradually expand.
Step 6. Monitor, Improve, and Scale
Once the integration is live, you’ll quickly see the benefits:
- Fewer miscommunications between support agents and developers.
- Faster efficient issue resolution for customers.
- More time for both teams to focus on their core work.
And here’s the best part: you can scale. Add more Jira projects, extend rules to handle feature requests, or even link existing Freshdesk and Jira tickets to keep historical data connected.
Getint also provides excellent support if you run into challenges. Our team helps fine-tune your integration work so you can maximize value from day one.

Best Practices for Freshdesk to Jira Integration
Here are a few lessons we’ve learned from thousands of successful setups:
- Map Freshdesk fields wisely – Don’t sync everything by default. Choose only the fields that matter most to your Jira team.
- Test with real customer tickets – Before a full rollout, use a set of existing Jira issues and existing Freshdesk tickets to validate your workflow.
- Keep communication clear – Remember, this setup isn’t just about data. It’s about aligning your support teams and engineers for smoother customer conversations.
- Iterate often – Your workflow will evolve. Keep adjusting your integration to match new business needs.
Jira Freshdesk Integration: Bringing It All Together
A Freshdesk integration with Jira isn’t just a technical exercise—it’s a way to let your teams breathe easier.
Your support agents continue delighting customers in Freshdesk support, your developers keep building inside Jira, and thanks to the Jira integration app, everything just flows.
No lost customer name, no missed updates, no endless chasing. Just smooth collaboration, sync comments, and a workflow that feels natural.
Whether you’re handling hundreds of customer tickets a week or carefully tracking every feature request, this integration will make your teams faster, your data cleaner, and your customers happier.
And when you’re ready to scale, Getint has your back—with excellent support, proven expertise, and an app built for enterprises and growing teams alike.