
For many teams, Jira is the system of record for planning, while GitLab is where code is written, reviewed, and deployed. The problem? These two tools don’t always talk to each other. Developers push commits and open merge requests in GitLab, but Jira work items stay untouched. Managers looking at Jira boards see no sign of what’s really happening in GitLab repositories.
A GitLab integration with Jira solves this. It connects planning and development, linking Jira work items with GitLab branches, commit messages, and CI/CD pipelines. Teams gain searchable development context, fewer manual updates, and smoother workflows.
This guide explains:
- Why connecting Jira and GitLab matters for software and business teams
- Common use cases that highlight the value of integration in GitLab
- Available integration options (native, third-party, and Getint)
- A practical setup path with Getint integration platform
- Best practices for secure, reliable synchronization
- Key benefits that make integration worthwhile
Why Integrate GitLab with Jira?
Jira and GitLab serve different purposes. Jira structures projects, backlogs, and reporting. GitLab hosts source code, manages branches, and powers CI/CD pipelines. Without integration, teams face real challenges:
- Jira work items don’t reflect code progress
- Code changes are completed, but Jira boards still show “in progress”
- Devs waste time copying commit messages into Jira manually
- Leadership can’t track deployments against planned tasks
On the other hand, when you integrate GitLab with Jira, these gaps disappear. You create a live link where every commit message, issue, or deployment automatically connects to the right Jira work item. The result is consistent work context, smarter automation, and less manual effort.

Common use cases
Integration isn’t just about convenience. It changes how teams coordinate work across planning and delivery.
Traceability from commit to work item
When users include a Jira key in commit messages or branch names, those commits are automatically linked to the related Jira work item. Teams get an auditable history from idea to code change.
Merge requests visible in Jira
Merge requests in GitLab often mark the most important milestones. With integration, their status, author, and linked work items appear directly in Jira, so managers don’t need to leave their boards to track progress.
CI/CD pipeline results in Jira
A feature isn’t finished when code is merged — it’s finished when it’s deployed. CI/CD events from GitLab sync to Jira, so stakeholders know when work items have truly been delivered.
Automation through commits
Smart commit commands let developers update Jira automatically. For example:
AUTH-234 #close Fixed login bugcloses the Jira work item when the commit is pushed, without anyone leaving GitLab.
Large-scale, enterprise workflows
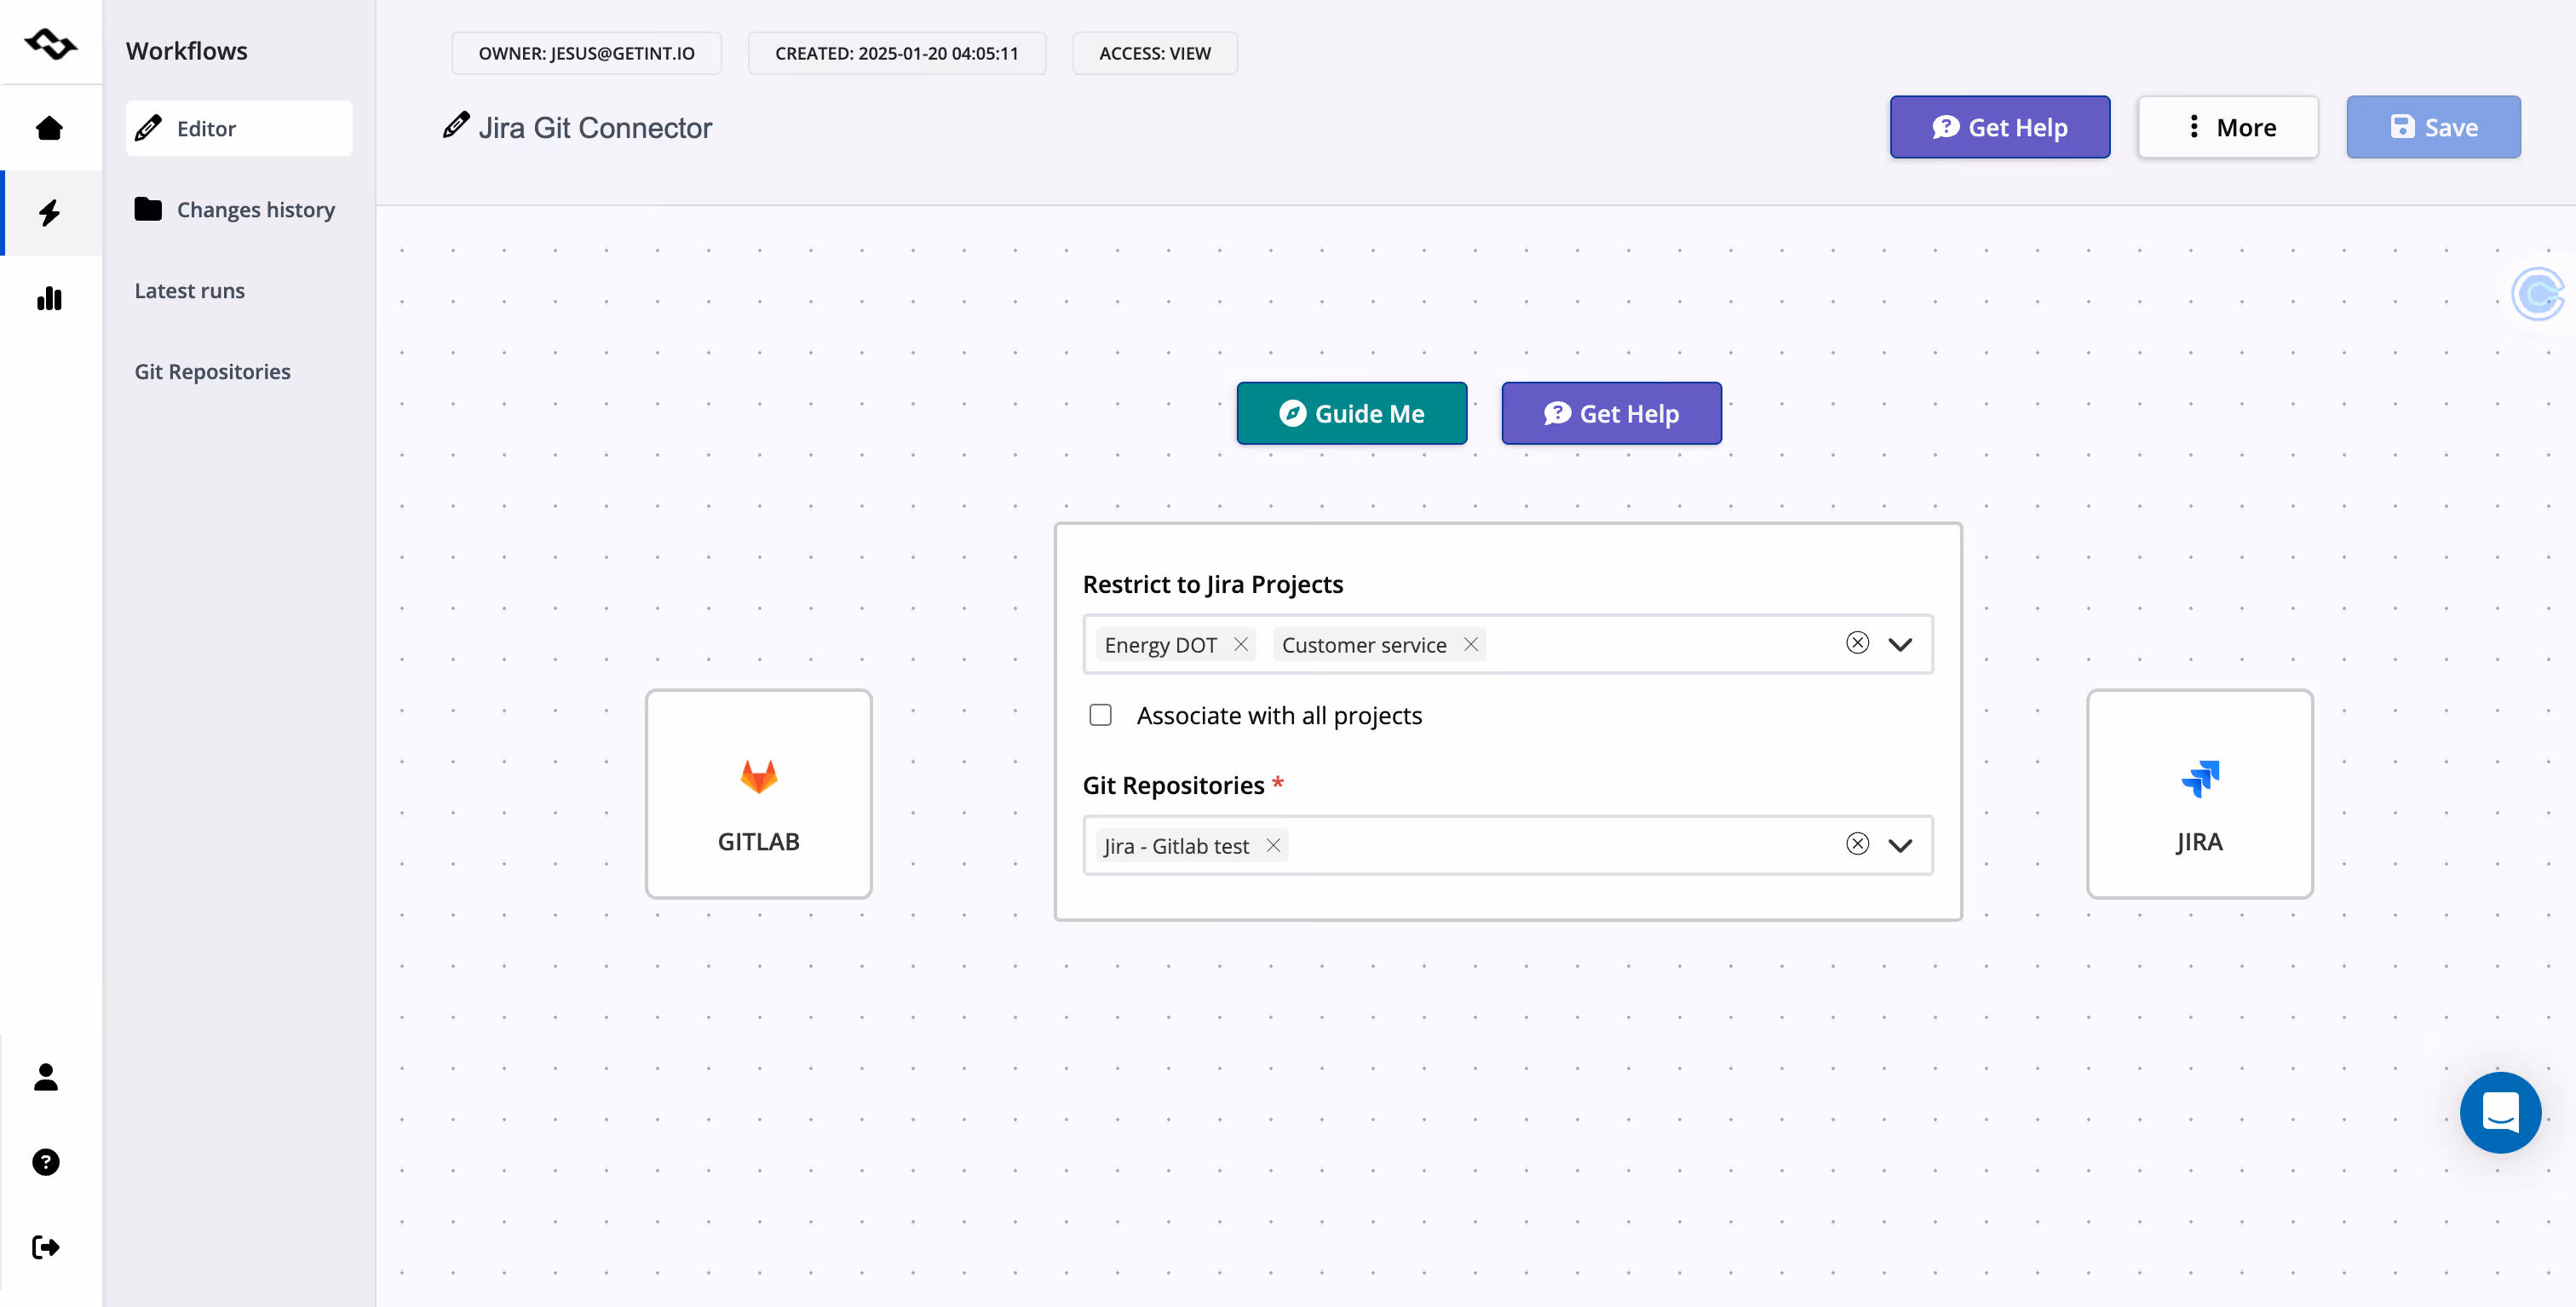
Enterprises often use Jira Data Center with GitLab self-managed. Integration supports secure synchronization across multiple projects and repositories, with filters to control scope and the ability to backfill historical data.
Integration options
Different organizations have different requirements depending on their hosting model, scale, and security posture. There are three main ways to connect Jira and GitLab.
Native GitLab integration
GitLab includes a built-in Jira connector. In project settings, you enter the Jira site URL and authenticate with your Jira account or API token. Once enabled, commit messages and merge requests that reference Jira work item keys automatically link back to Jira.
This option works best for small teams on Jira Cloud and GitLab SaaS who only need basic visibility. Its limitations include no advanced field mapping, no two-way synchronization, and limited flexibility for Jira Data Center or GitLab self-managed.
Third-party automation tools
Some teams use generic automation services to create simple rules, such as “when a GitLab issue is created, create a Jira work item.” These can help with lightweight workflows, but they usually lack depth: no CI/CD integration, no backfill, and no compliance-grade security.
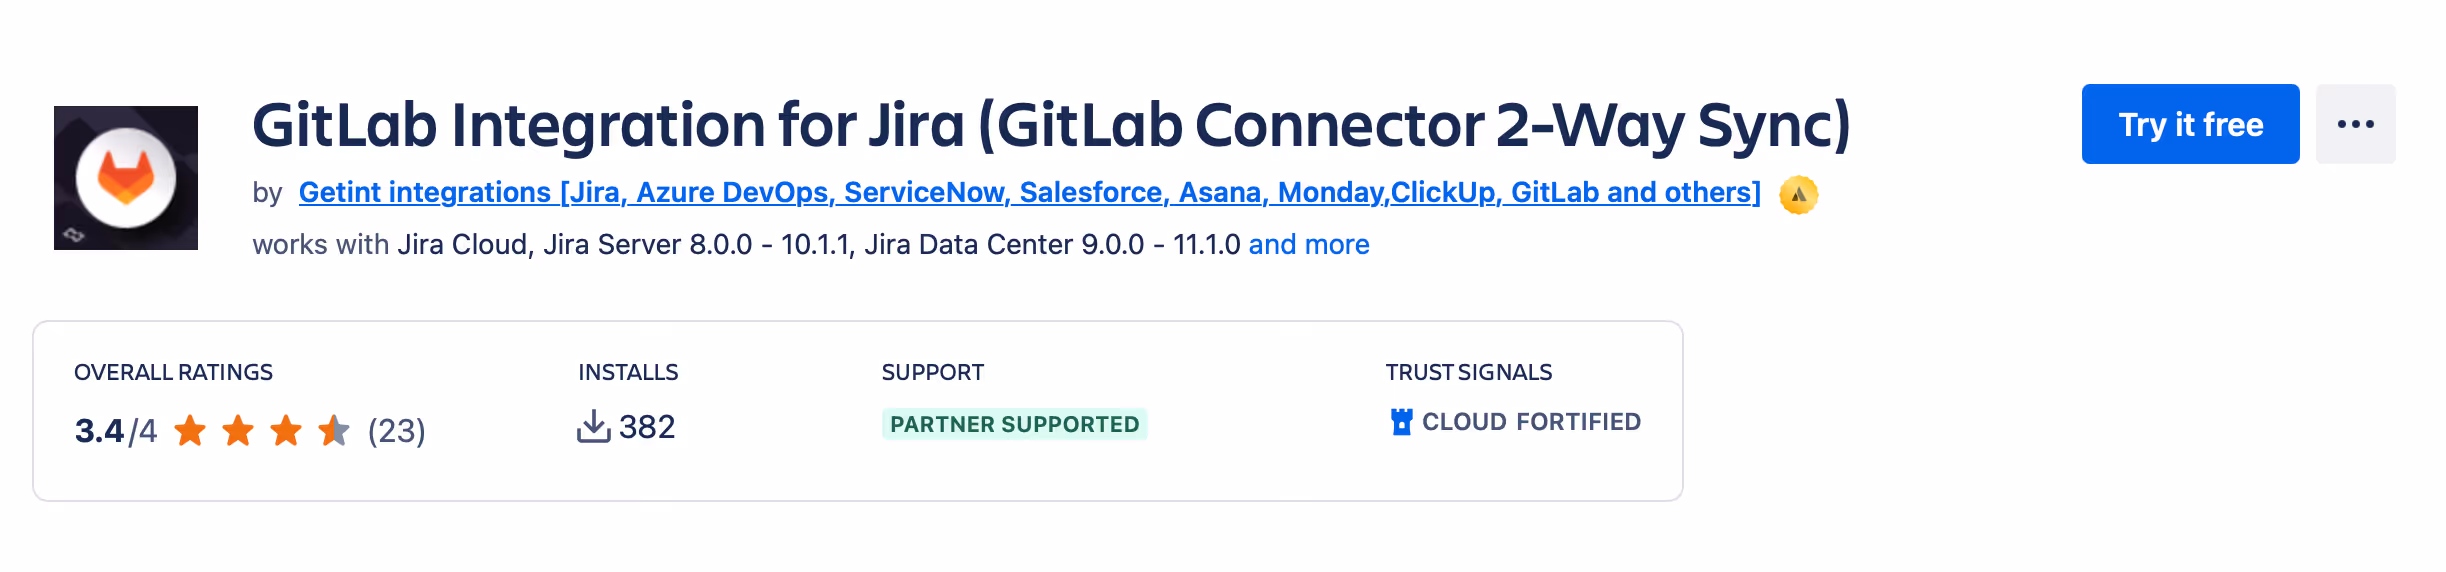
Getint GitLab Integration For Jira Cloud, Jira DC and Jira Server
For organizations needing a robust connection, the Getint app — available on the Atlassian Marketplace — provides a dedicated two-way GitLab Connector.
What Getint offers:
- One-way/two-way synchronization of work items, commits, branches, comments, and attachments
- Support for Jira Cloud, Jira Data Center, and GitLab self-managed installations
- Migration and backfill to import historic GitLab data into Jira
- Advanced field mapping and customizable sync rules
- Filtering options to include only the repositories, branches, or labels that matter
- Enterprise security and compliance, including ISO 27001 & ISO 27018, SOC 2 Type II, and GDPR
With Getint, both development and project management teams work in their preferred tools while sharing the same real-time view of progress.
Prerequisites for setup
A smooth setup requires a bit of preparation. Before you integrate Jira with GitLab, make sure you have:
- Jira admin access (Cloud or DC)
- GitLab account with rights to manage settings
- Jira site URL (for example, https://yourcompany.atlassian.net)
- API token for Jira Cloud, or service account credentials for Jira DC
- GitLab application created in Settings → Applications, with redirect URI, client ID, client secret, and proper scopes
- A clear plan for which Jira projects should connect to which GitLab projects
- Defined goals: one-way visibility, two-way synchronization, or migration/backfill
Step-by-step setup with Getint
Here’s how to enable integration with the Getint app:
Step 1: Install the Getint app
From the Atlassian Marketplace, search for “GitLab Integration for Jira” and install the app in your Jira instance.
Step 2: Create a new integration
Open the app in Jira and click “Create Integration.” Choose Continuous Sync for real-time two-way updates, or Data Migration if you want to backfill historical GitLab data first.

Step 3: Authorize Jira
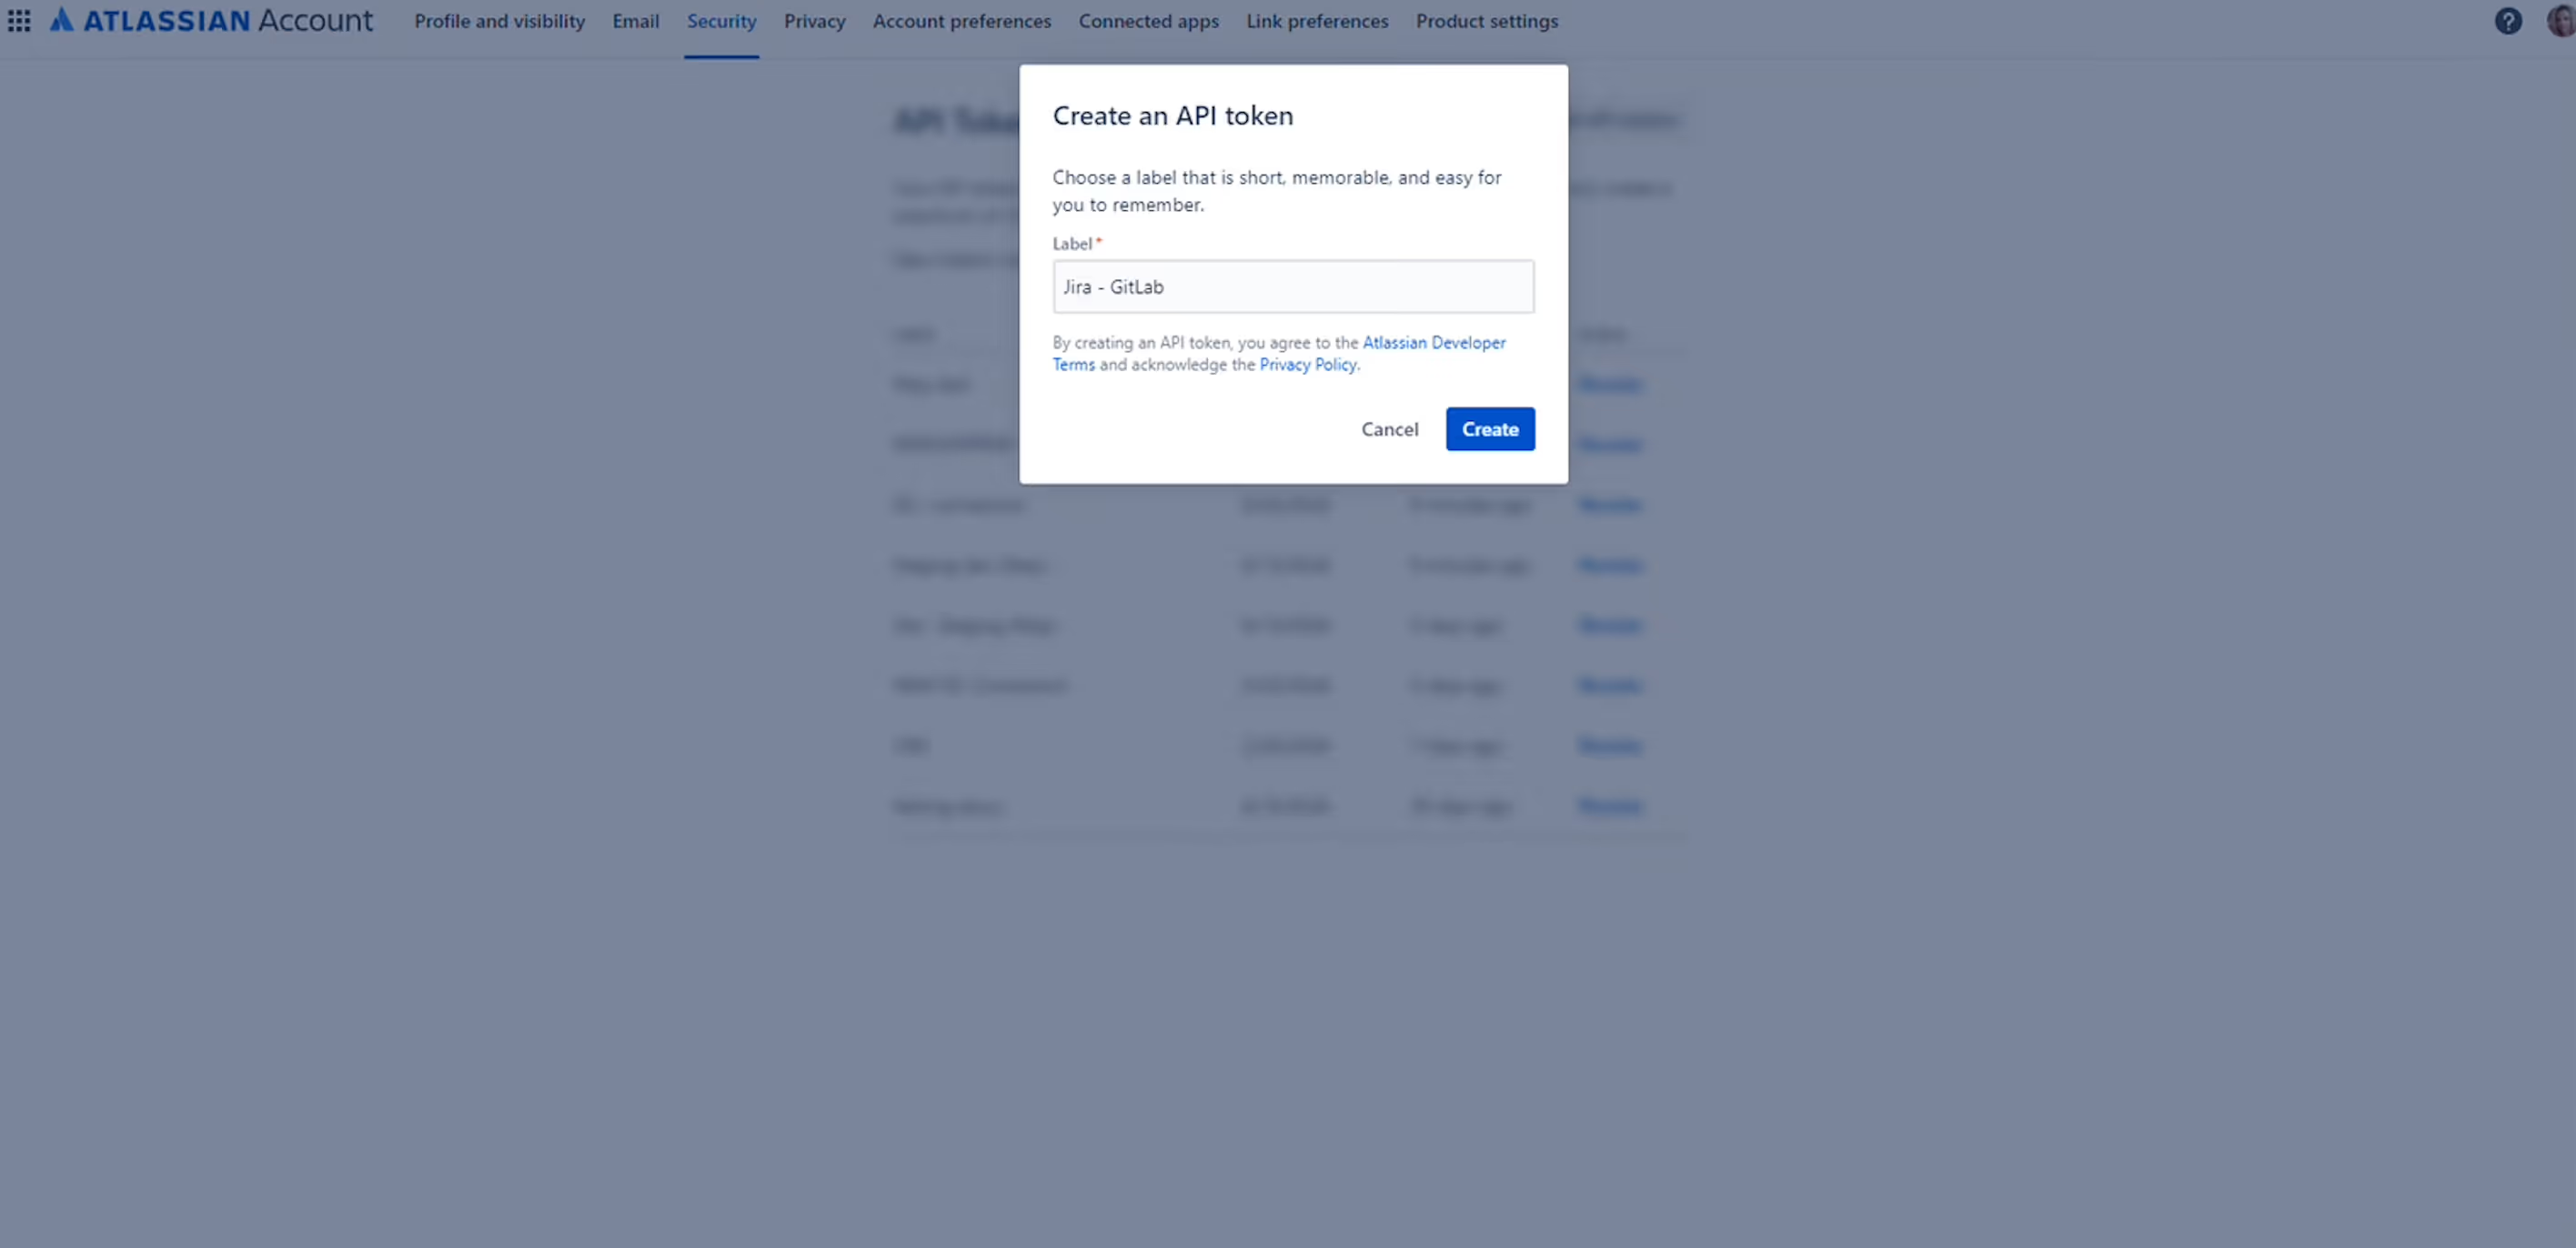
For Jira Cloud, you need a Jira token, recognizable as your password:
- Head to your Atlassian Profile Settings.
- Find Security section and select "create API token" (remember to save it somewhere and keep safe).
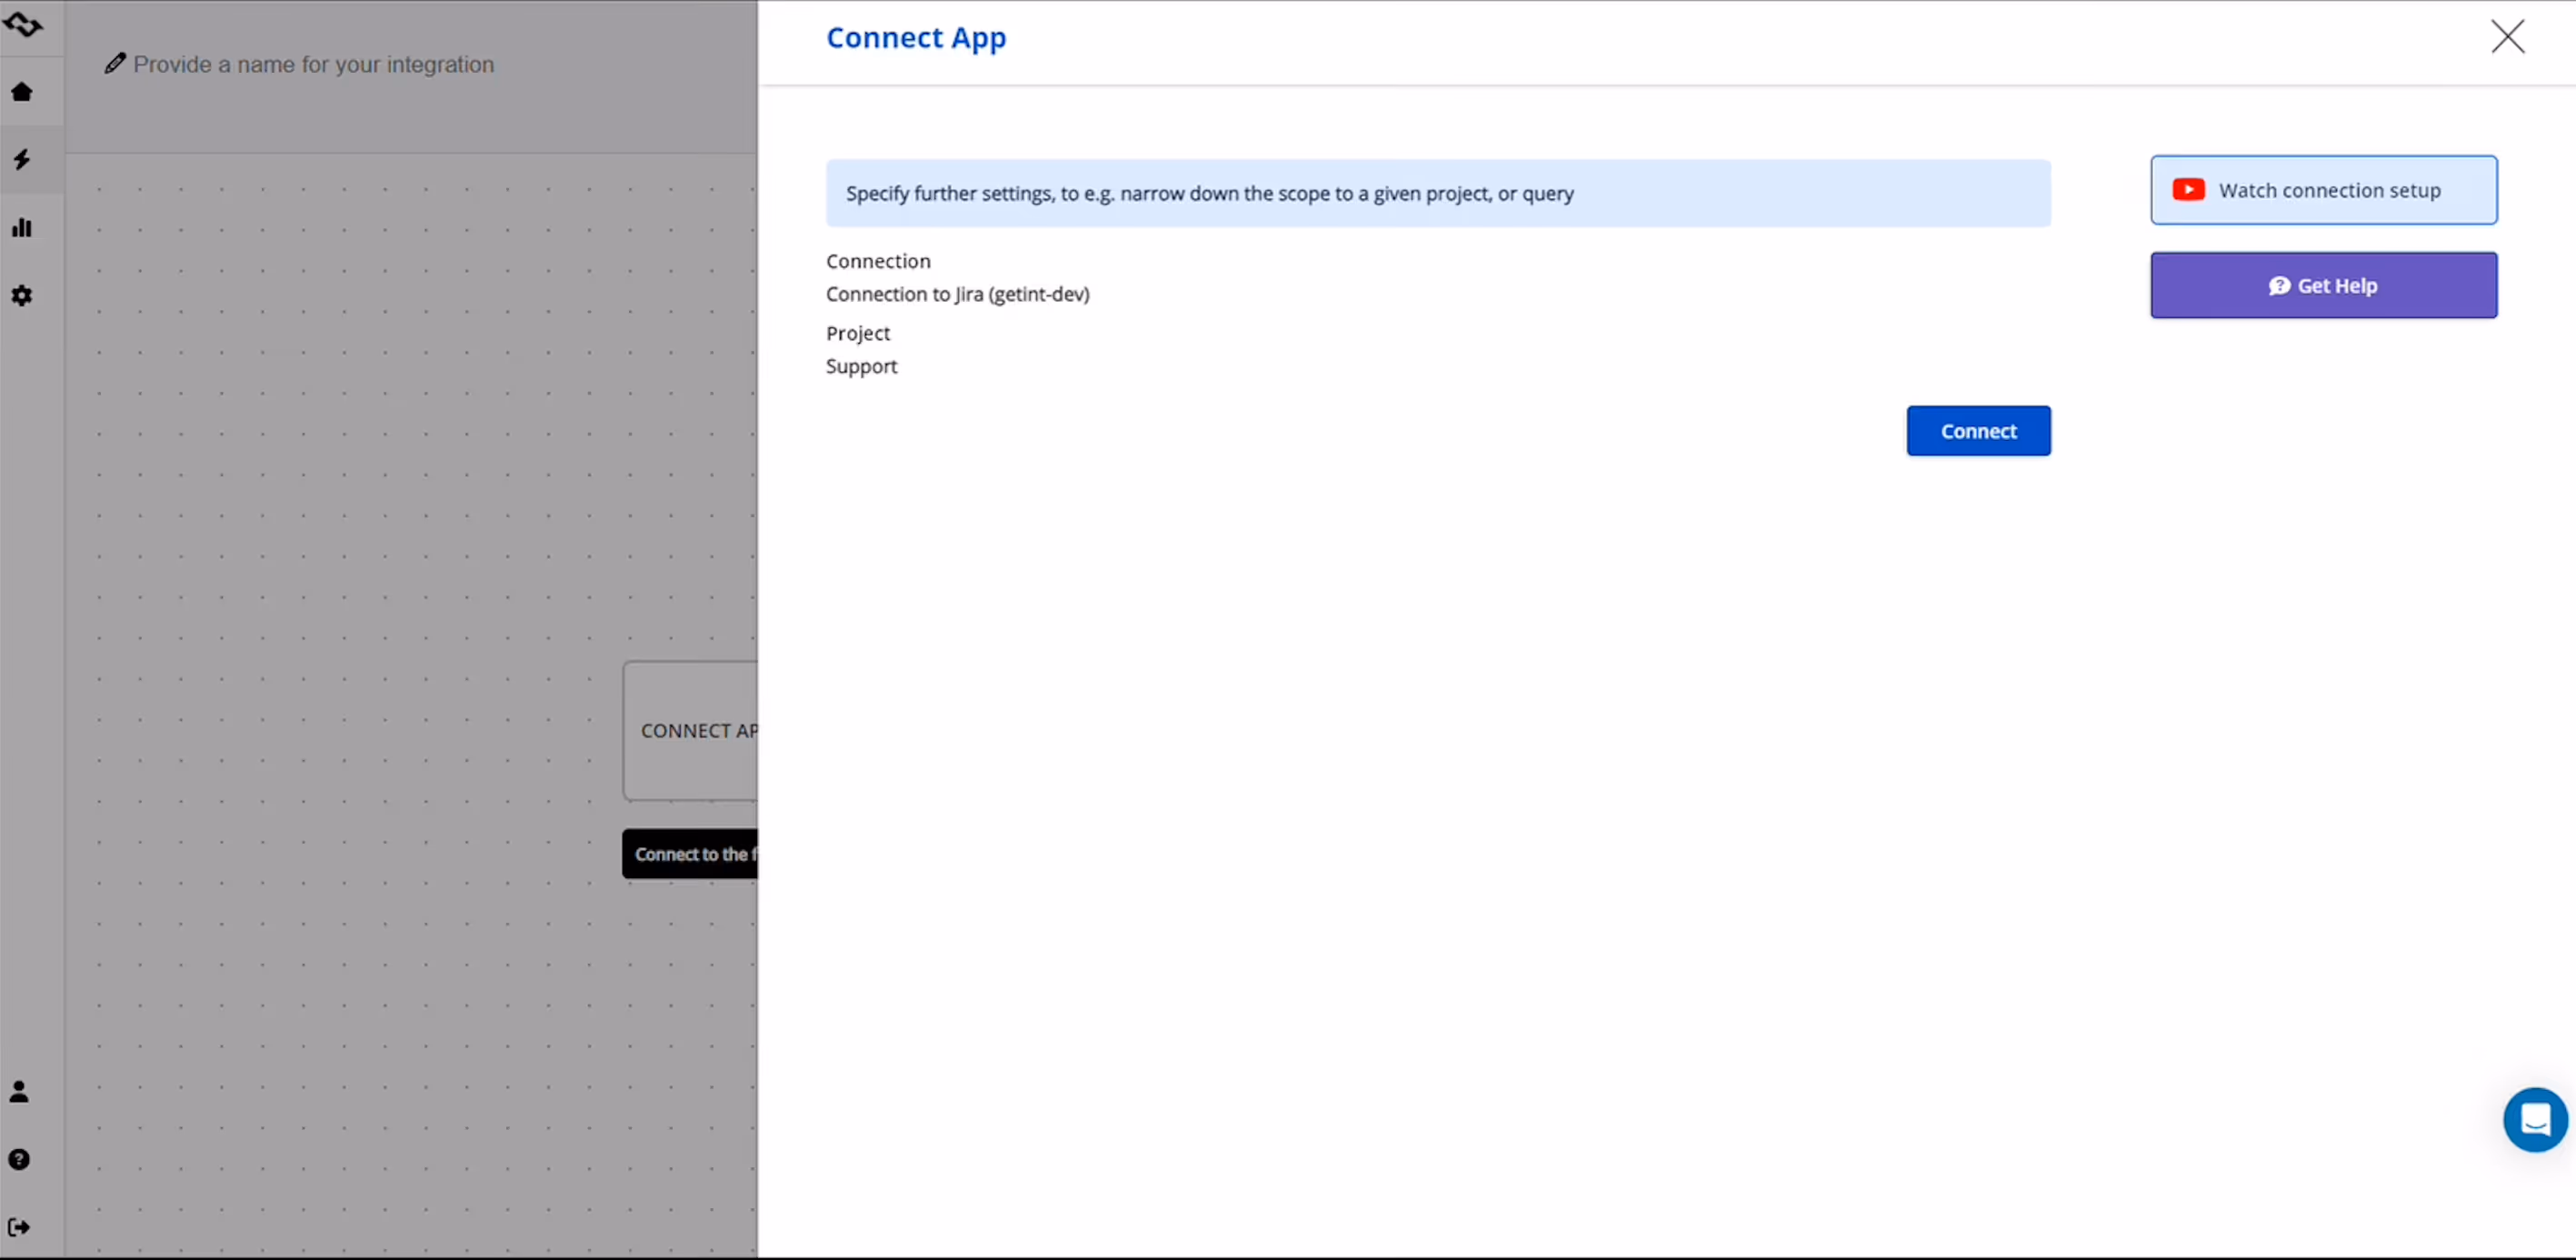
You can now start establishing the connection:
- Being logged in as a user with admin rights, let's click the button "Select App" > Jira.
- You can set new connection with your Jira instance by adding the URL of your Jira instance.
- Provide login credentials of the admin user.

Select Jira project you want to sync.
Step 4: Authorize GitLab
To authorize GitLab, you can follow the steps from our documentation or head to our short tutorial.
Now, you can select the second app and repeat the steps like with Jira.
Step 5: Map projects and repositories
Select the Jira projects you want to integrate and link them with the relevant GitLab repositories. Many organizations connect multiple repos to a single Jira board.
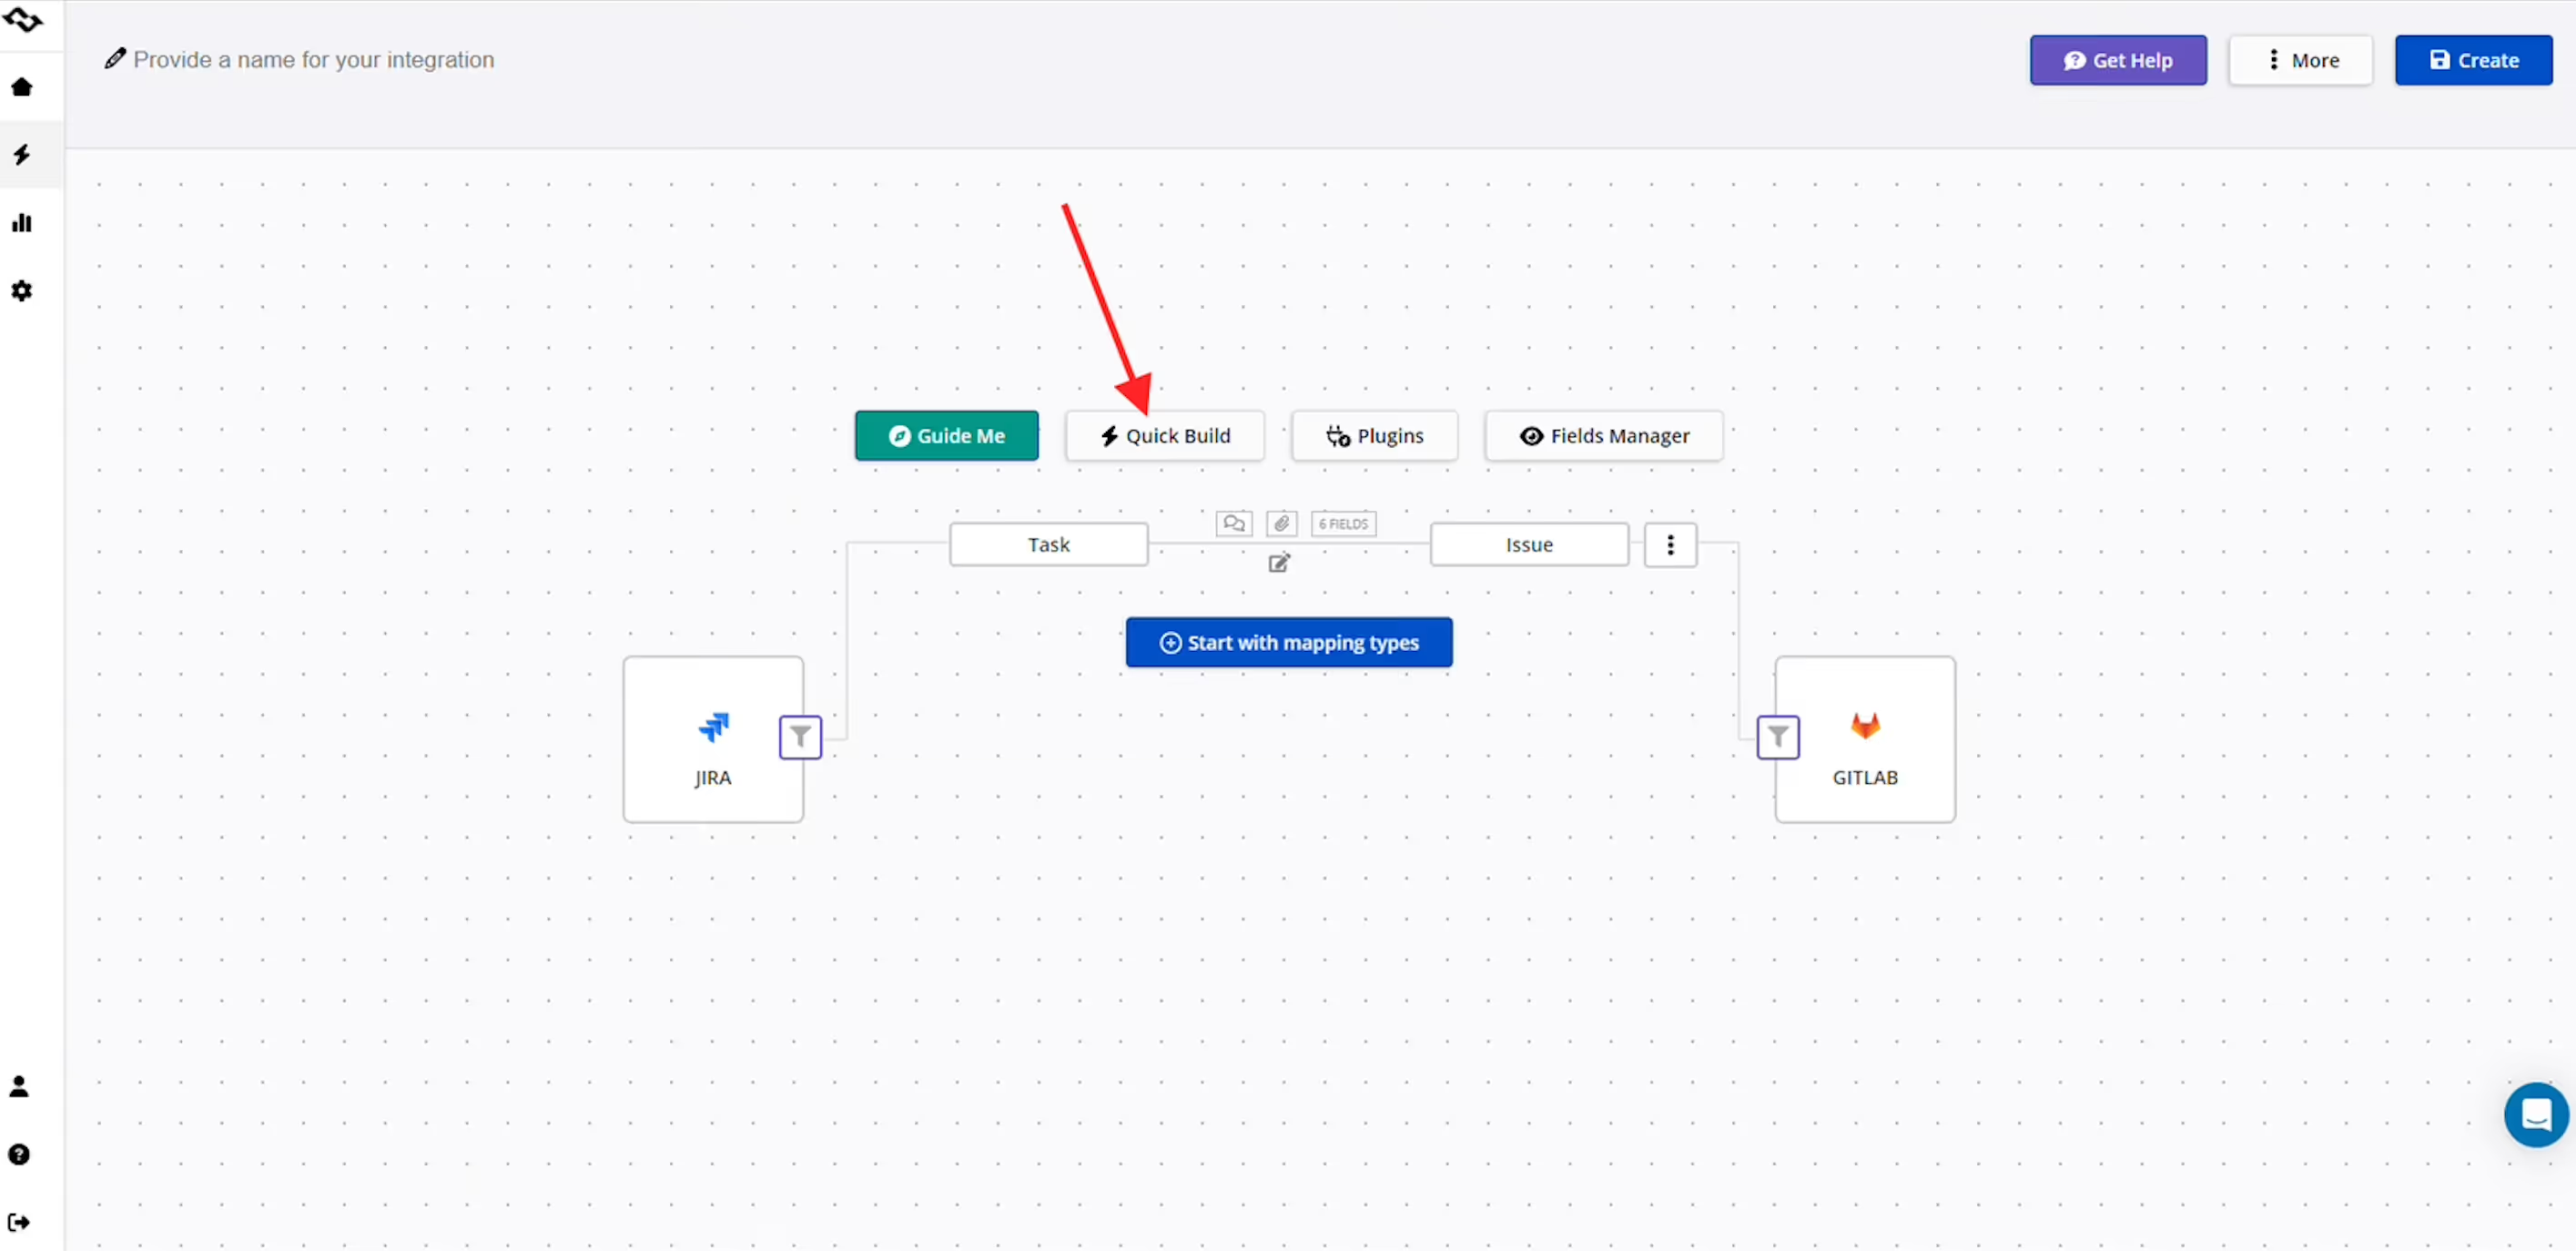
Step 6: Configure type and field mapping
It's time to map Jira issues/work item types you want to sync with GitLab issues, ex.: Jira bug - GitLab issue.
*You can try using "Quick Build" feature to automate type and field mapping if you want to spend even less time on the setup process.
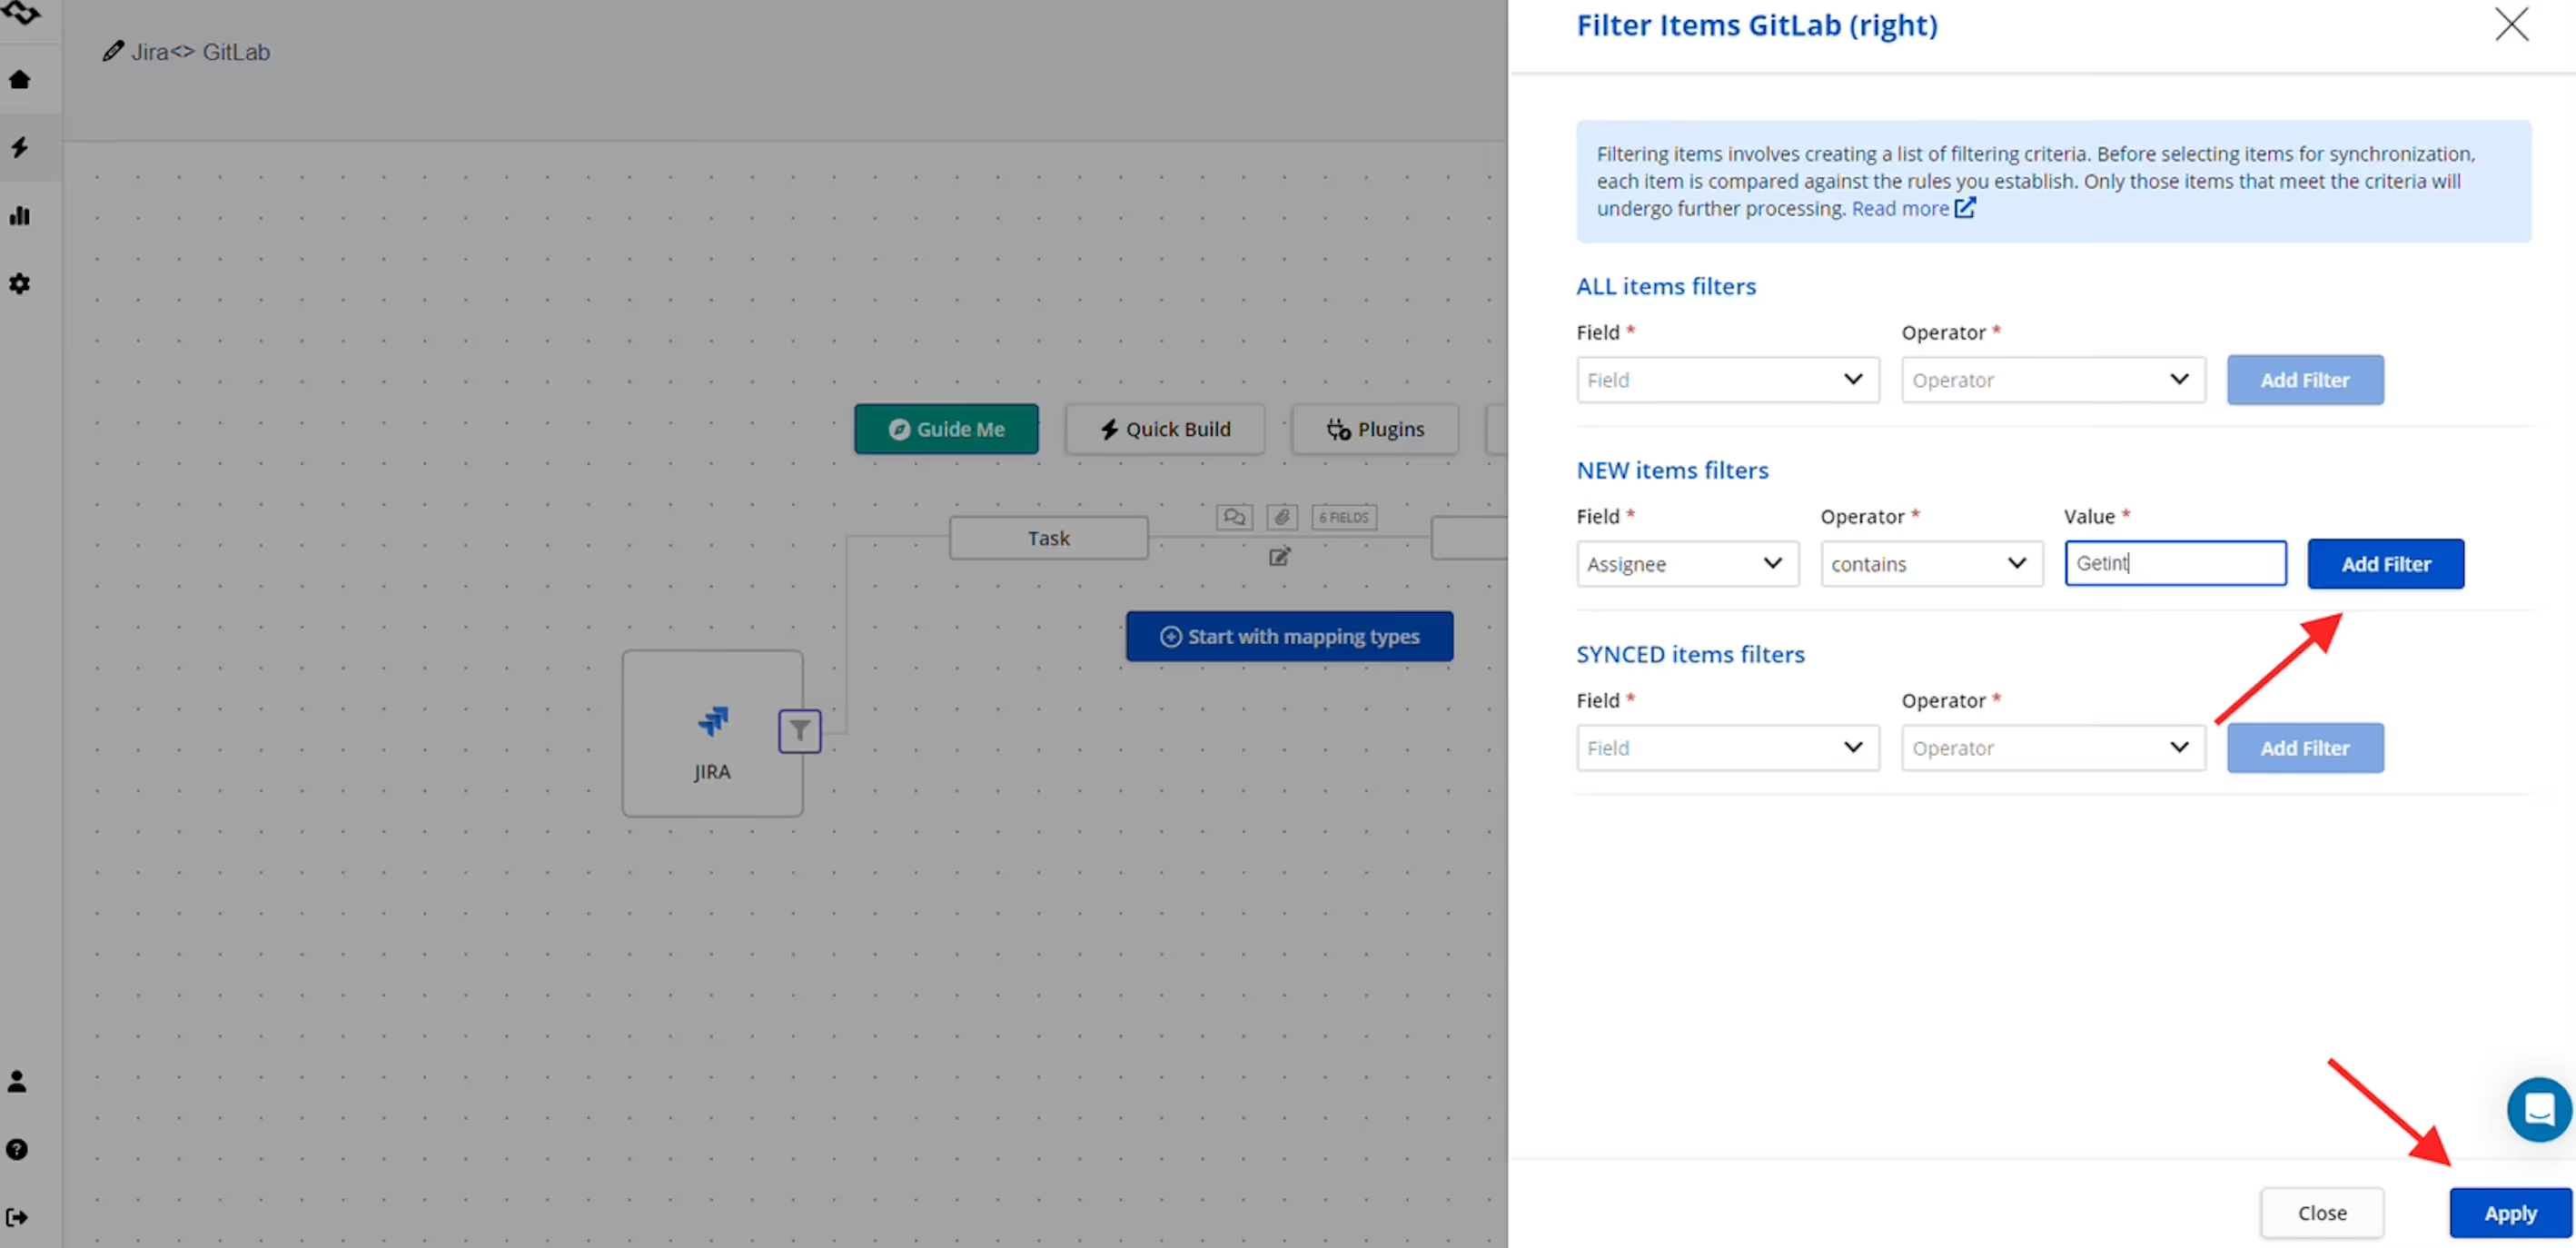
Step 7: Apply filters
Set filters to exclude archived branches, drafts of requests, or repos outside the scope. Decide whether filters apply only to new items or also to already synced ones.
Step 8: Test the connection
Click “Test Settings” to verify that the integration works. Push a commit with a Jira work item key, create a merge request, and check that updates appear in Jira correctly.
Step 9: Roll out across teams
After successful testing, expand the integration to additional projects and teams. Monitor sync logs and adjust filters or mappings as workflows evolve.
Best practices for ongoing success
Configuring the integration is only the beginning. Without consistent habits, even a strong setup can degrade over time. Tokens expire, teams forget to include keys, or Jira fills with irrelevant data. To avoid this, establish clear practices from the start.
Recommended best practices include:
- Always include Jira work item keys in branch names and commit messages
- Use dedicated service accounts rather than personal ones to maintain stability and auditability
- Rotate API tokens regularly and enforce HTTPS for secure connections
- Start with a pilot integration, then scale gradually across teams
- Review logs and sync activity weekly to catch errors early
- Document mapping and filter rules so teams know how to work with the integration
- Apply filters strategically to keep Jira focused on relevant development data
Benefits of Connecting GitLab Projects with Jira Sites
The impact of integrating Jira and GitLab extends beyond convenience. It reshapes how teams collaborate and deliver software. Instead of working in chaos, everyone shares the same view of progress, from planning to production.
Key benefits include:
- Real-time visibility of GitLab commits, branches, merge requests, and pipeline results in Jira
- Less manual effort for developers by automating Jira updates through commits and merge requests
- Clearer release tracking with deployments tied to the right Jira work items
- Preservation of historical data during migrations or system consolidations
- Enterprise support for Jira Cloud, Jira DC, GitLab SaaS, and GitLab self-managed
- Stronger collaboration between project managers, developers, and stakeholders
Conclusion
Integrating Jira with GitLab creates a strong connection between planning and execution. Jira work items mirror GitLab activity in real time, showing commits, merge requests, and deployments alongside planned tasks. Developers keep working in GitLab with the code, managers track progress in Jira, and both sides gain consistent context.
For smaller setups, GitLab’s built-in integration may be enough. For teams that need two-way sync, advanced mapping, backfill, and compliance-ready security, the Getint app on the Atlassian Marketplace is worth to consider choice.
By setting up the integration thoughtfully and maintaining best practices, you’ll reduce manual effort, improve collaboration, and give your teams the visibility they need to deliver software faster.