
Many development teams use Jira for project management and a Git repository (GitHub, GitLab, or Azure DevOps) to manage code. However, without a proper connection between these tools, Jira work items and development activity remain disconnected.
If you're wondering how to connect Jira with a Git repository, the goal is simple: link commits, branches, and pull requests directly to Jira work items so teams can track development progress without switching tools.
This guide explains how to connect Jira Cloud with a Git repository, how the integration works, and what to expect once everything is set up.
Why integrate Jira with a Git repository?
Jira software is designed for managing work items, planning projects, and tracking progress. Git repositories, on the other hand, manage source code, commits, and development workflows.
When these systems are not connected:
- Jira work items do not reflect actual development progress
- Developers must manually update task status
- Commits, branches, and pull requests are not visible in Jira
- Teams lose traceability between requirements and code
By connecting Jira with a Git repository, you enable:
- Automatic linking of work items with development activity
- Visibility of commits, branches, and pull requests in Jira
- Near real-time progress tracking across teams
- Better alignment between project management and development
This is especially important for teams using Jira Cloud together with GitHub Cloud or GitHub Enterprise environments.

What you need before connecting Jira and GitHub
Before setting up the repo integration, make sure your environment is properly configured.
Requirements before you start connecting Jira App
- Jira Cloud instance (Jira Software or Jira Service Management)
- GitHub account with access to a repository
- Access to a GitHub organization (if applicable)
- Admin permissions in Jira
- Installed Git Connector for Jira app

Access and permissions
- Permission to access specific repositories
- Ability to authenticate via OAuth
- Admin rights to manage integrations in Jira
Recommended setup
- Use a dedicated service account
- Define mapping between Jira projects and repositories
- Standardize usage of Jira work item keys (Jira issue keys)
How to connect Jira with a Git repository using Getint Integration App
Below we shortly described a usual setup process with Getint that reflects real integration flow.
For more detailed instructions, head to our documentation.
Step 1: Install Git Connector for Jira
Install Git Connector for Jira from the Atlassian Marketplace.
After installation:
- open the app via Apps → Git Connector for Jira
This app is required to connect Jira with a Git repository.
Step 2: Create a new integration
Inside the app:
- Go to Integrations
- Click Create Integration
- Select Sync GIT Repository

This defines the integration type.
Step 3: Connect your repository (for example GitHub repository)
- Click Select app
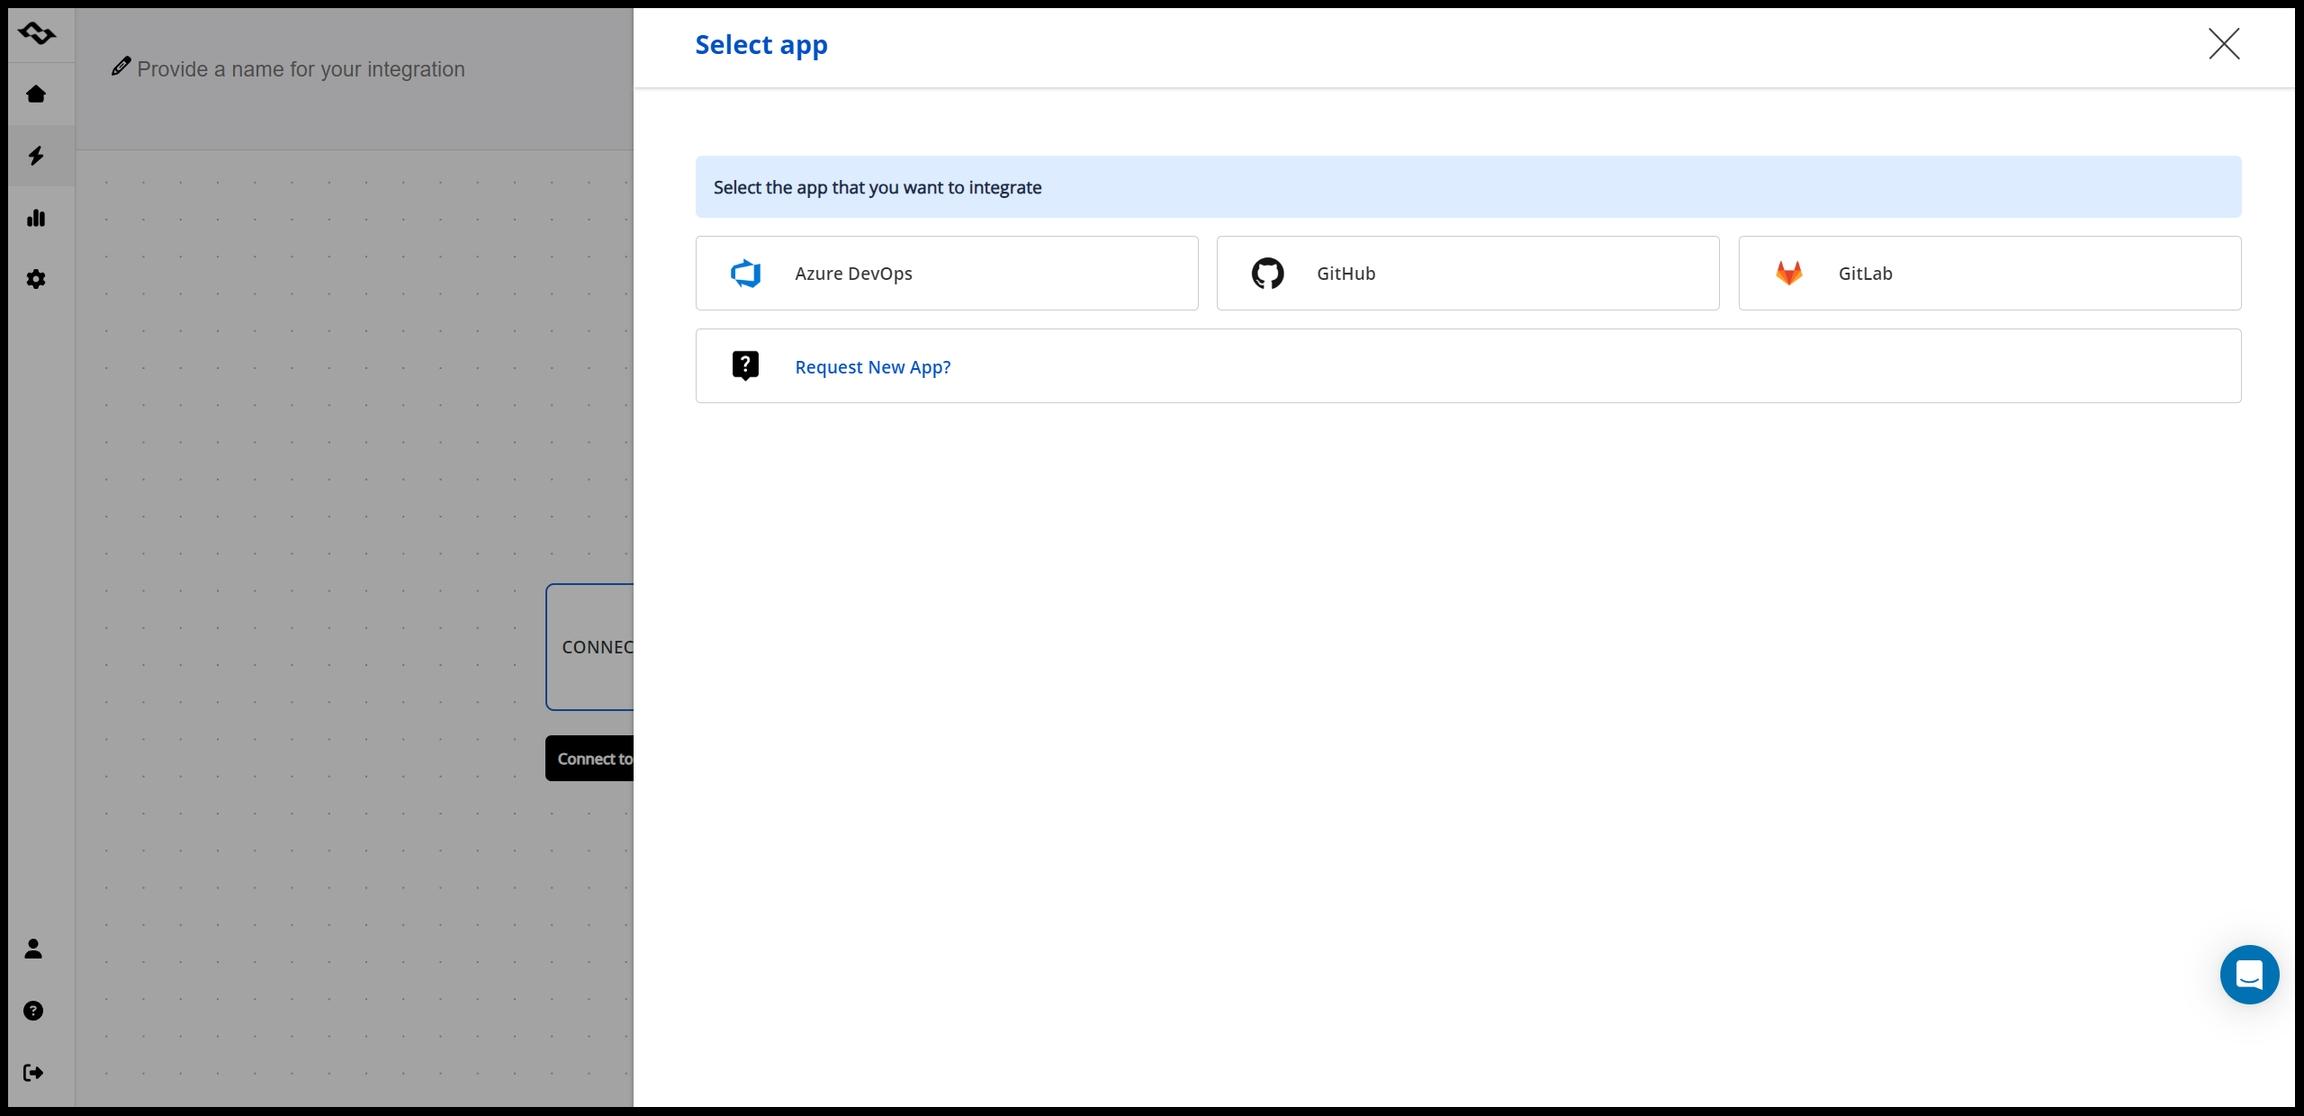
- Select GitHub
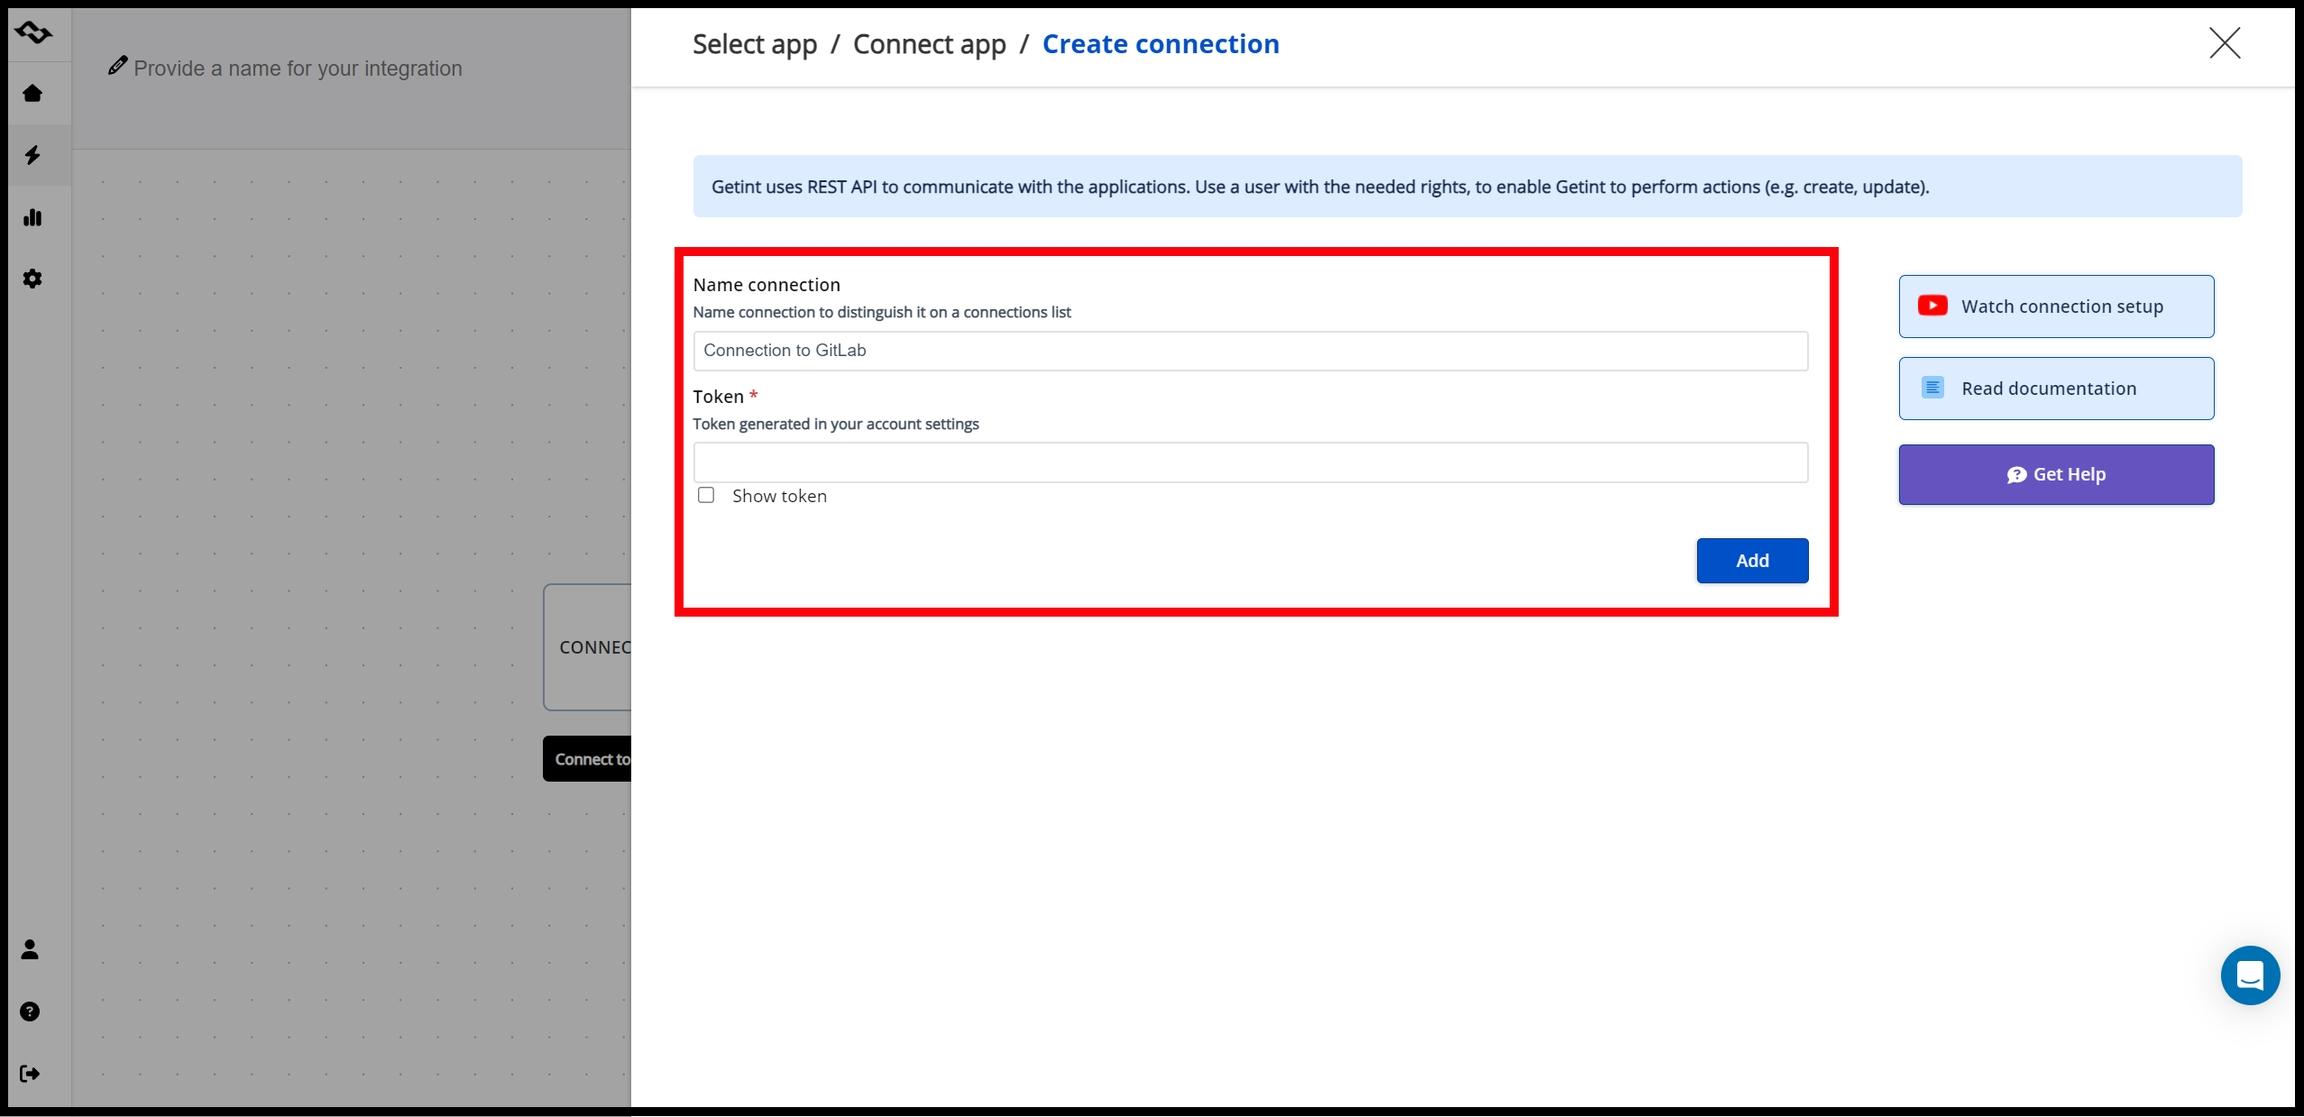
- Create a new connection or choose an existing one
During this step:
- authorize your GitHub account
- select your GitHub organization
- grant access to repositories
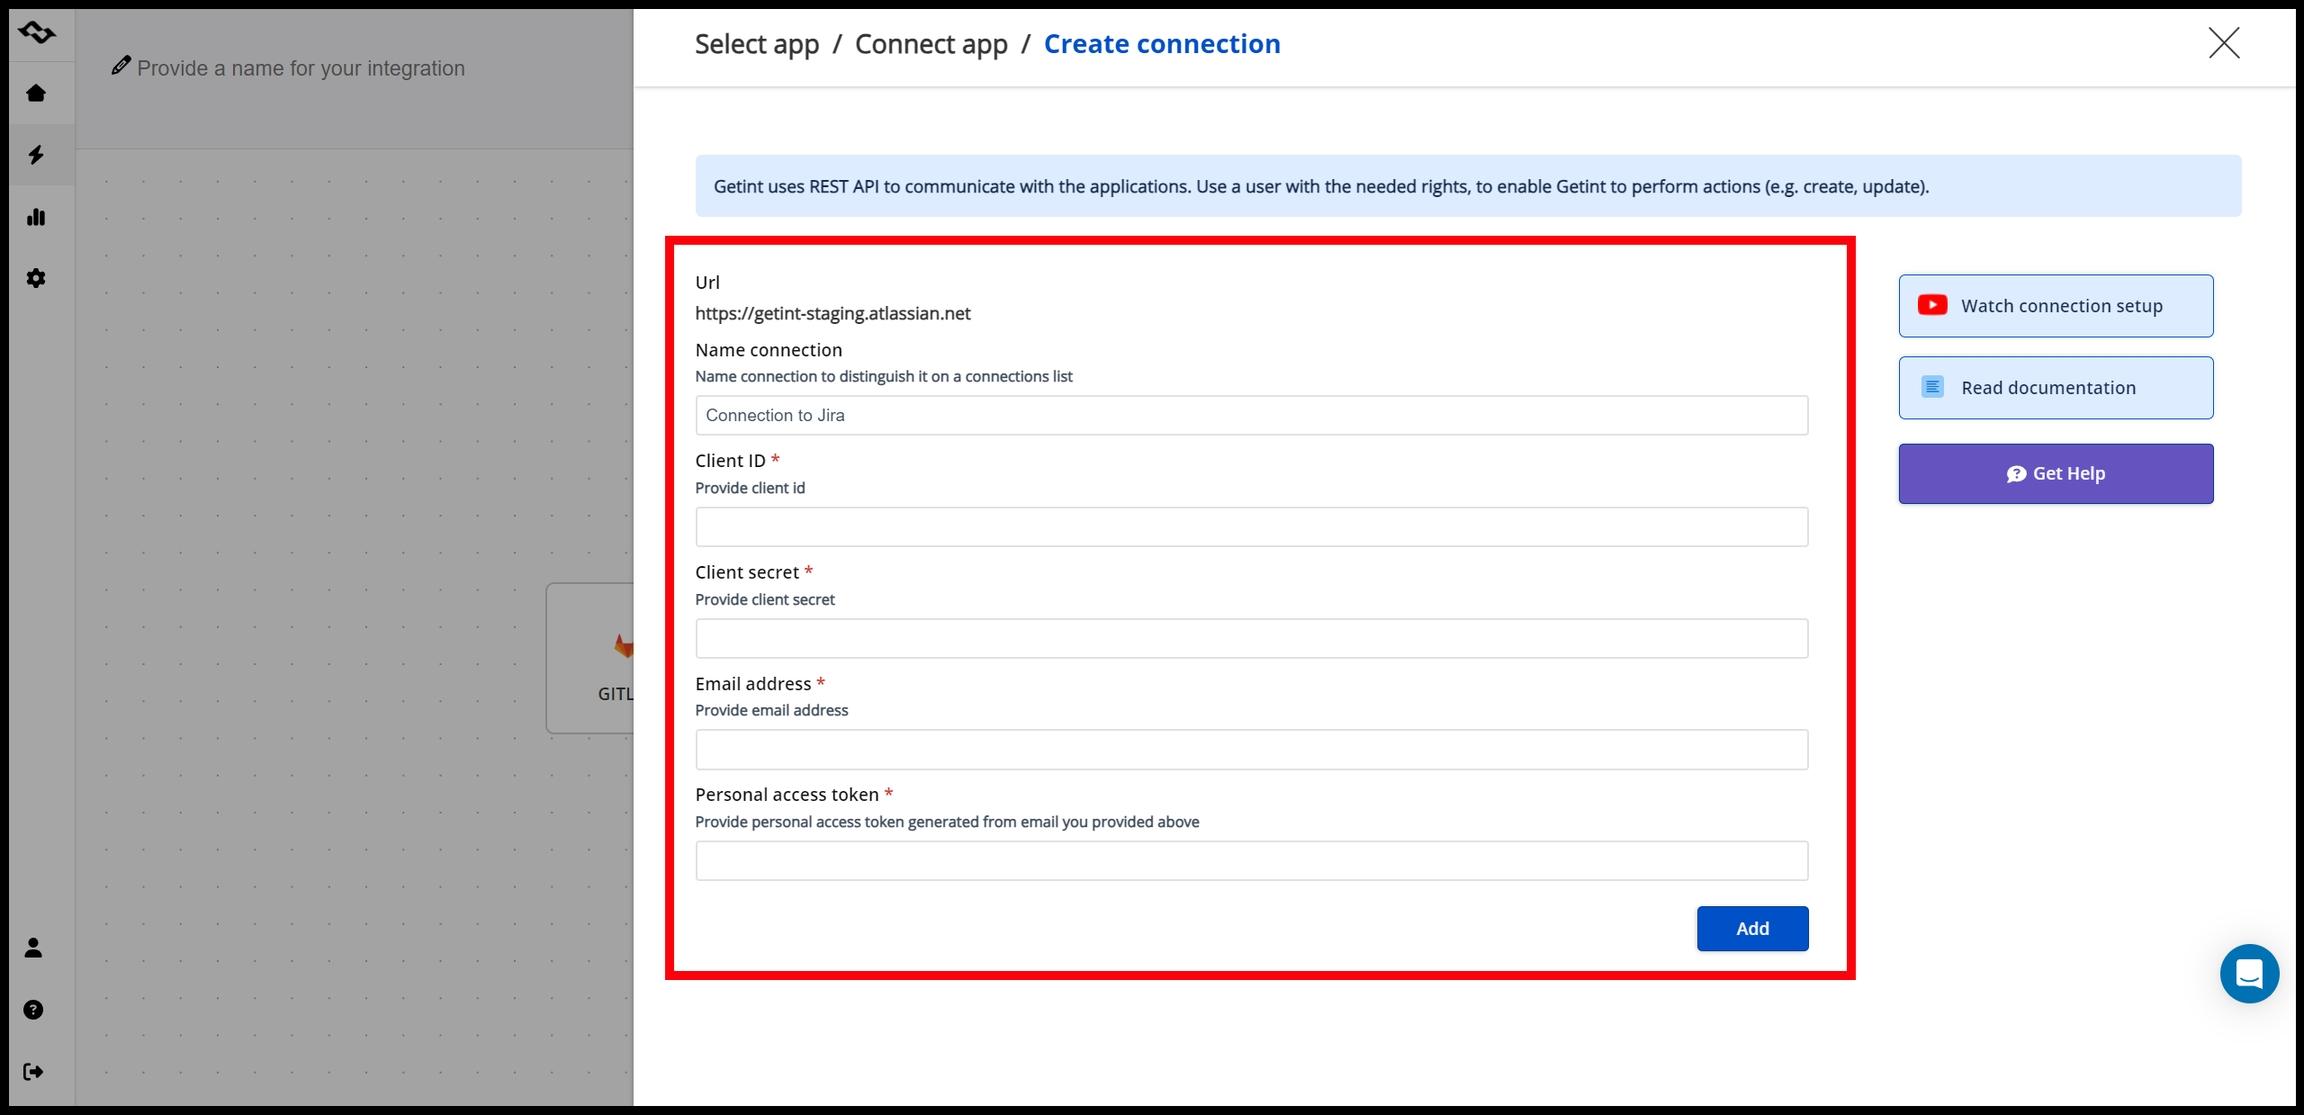
Step 4: Connect Jira Cloud using OAuth
Next, connect Jira:
- Click Connect app
- Select Jira
- Choose Create connection
- Enter your Jira URL
- Complete OAuth authentication
Jira OAuth is required for Git integrations in Getint and requires admin permissions.
Step 5: Define Jira project scope
You can decide how broadly the integration applies:
- Sync all Jira projects
- OR select specific Jira projects
Best practice:
- connect only relevant projects to avoid unnecessary data
Step 6: Select repositories
Now choose which GitHub repositories should be connected.
You can:
- select specific repositories
- limit integration to relevant projects
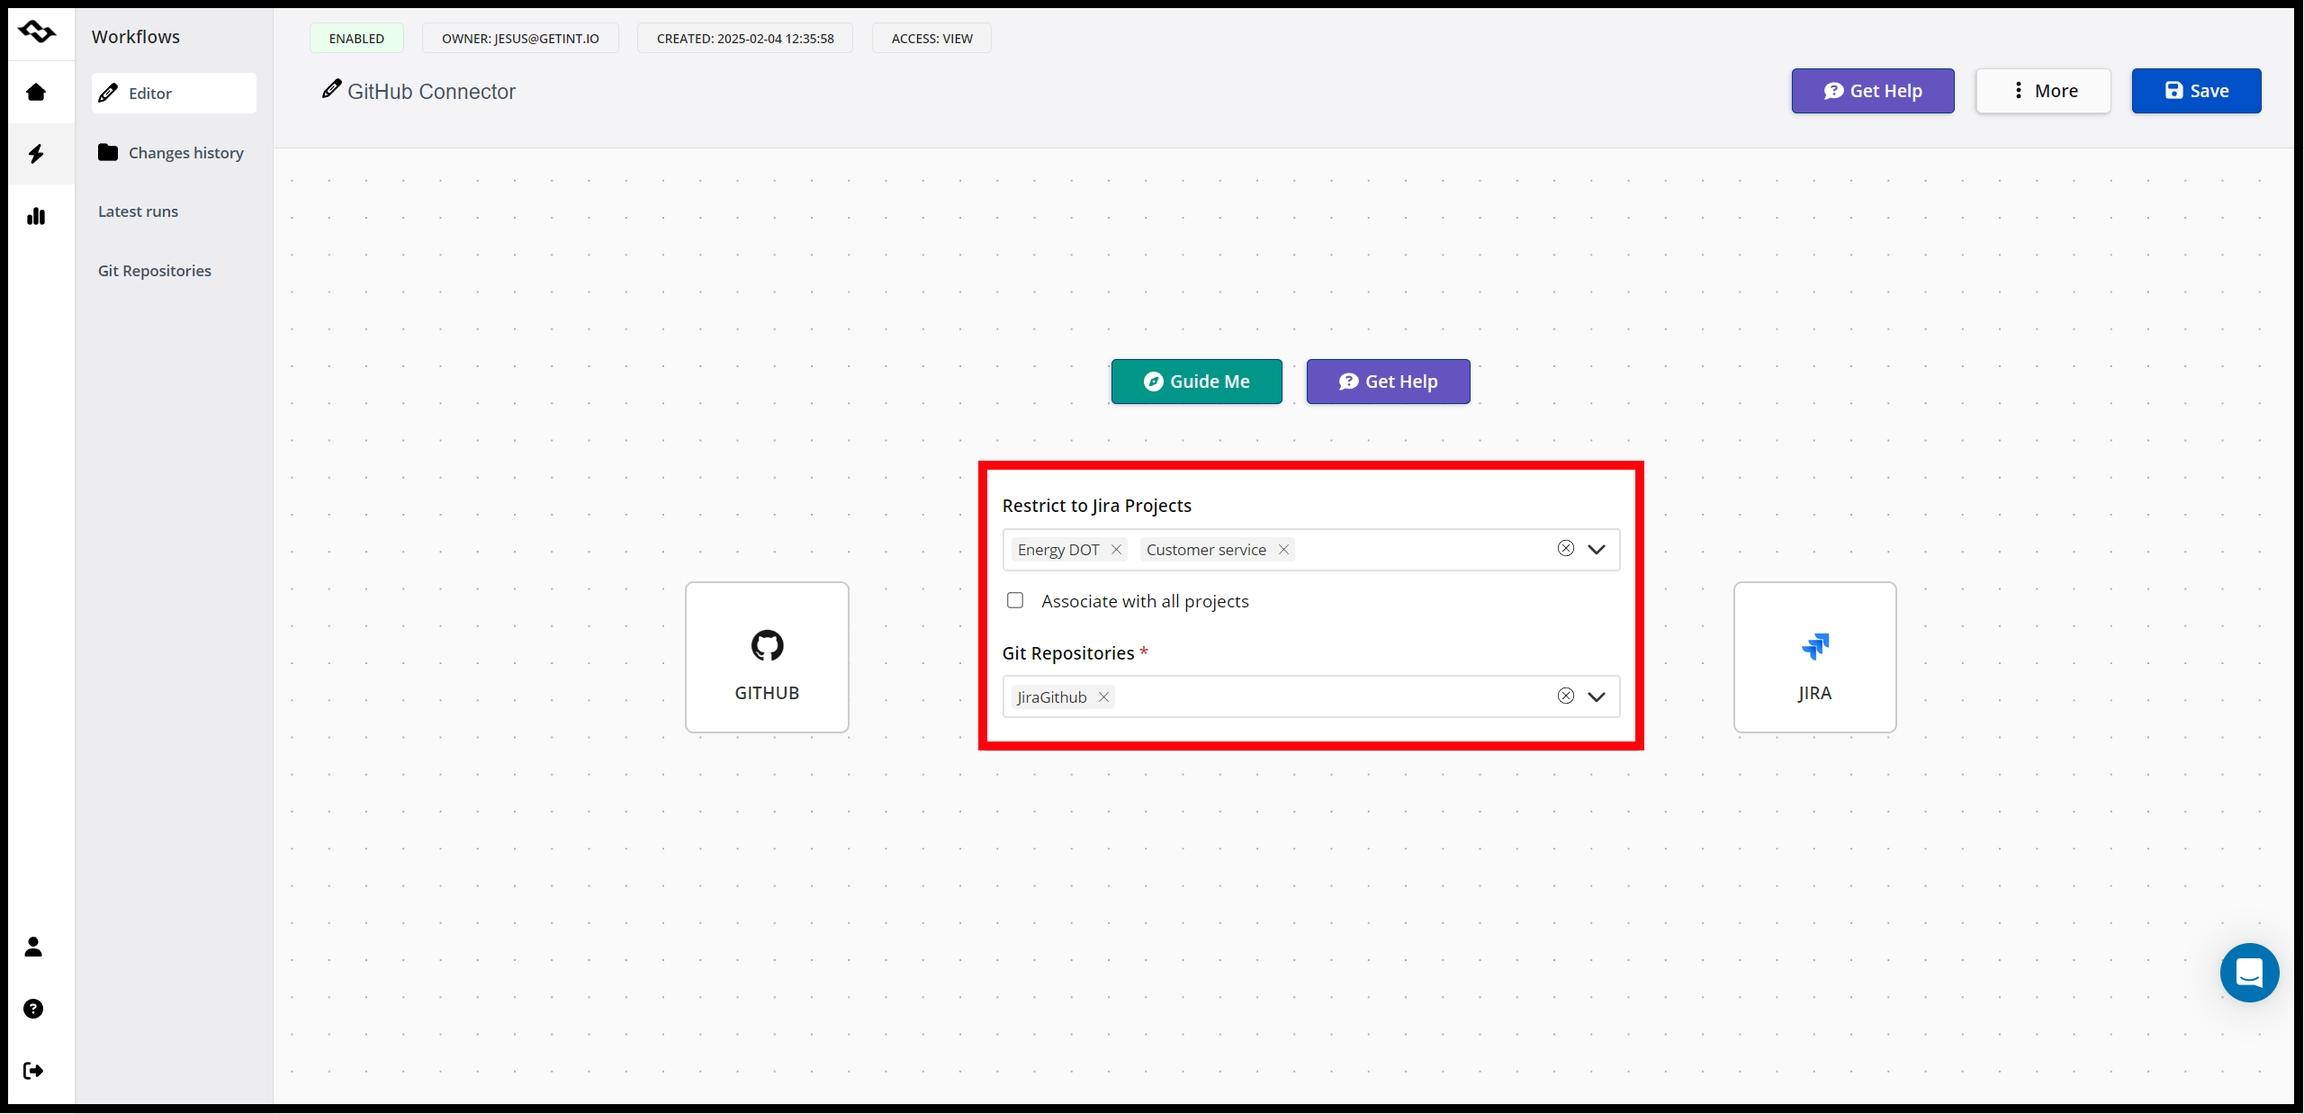
This step helps:
- improve performance
- reduce noise in Jira
- keep the integration manageable
Step 7: Create the integration
- Name your integration
- Review settings
- Click Create
The integration will start indexing:
- commits
- branches
- pull requests
Step 8: Verify the integration
To confirm everything works correctly:
- Create a branch with a Jira work item key
→ PROJ-123-login-feature - Make a commit referencing the work item
→ PROJ-123 fix login validation - Push changes to the repository
- Open the Jira work item
If configured correctly, you will see development activity in the dev panel.
What gets synced between GitHub and Jira?
How Jira work item keys link development activity
The integration depends on Jira work item keys (issue keys).
Where to include the key
- Branch names
- Commit messages
- Pull request titles
Example
Branch:
PROJ-456-user-authentication
Commit:
PROJ-456 fix authentication logic
Why this matters
- Enables automatic linking between Jira and GitHub
- Updates the Development panel in real time
- Eliminates manual linking
Without the work item key, development activity will not be connected to Jira.
How development activity appears in Jira
After connecting Jira with a Git repository each Jira work item displays:
- related commits
- linked branches
- pull request status
- overall development activity
This information is visible in the Development panel inside the Jira work item view.
This allows teams to:
- track progress without opening GitHub
- understand development status instantly
- improve collaboration between teams
Common issues when connecting Jira and GitHub
Repository not accessible
- Check GitHub permissions
- Verify organization access
Work items not linking to commits
- Missing Jira work item key
- Incorrect formatting
No development activity visible
- Repository not selected
- Integration not active
OAuth connection issues
- Reconnect Jira integration
- Verify admin permissions
Important: Getint Git integration works one-way:
- Data flows from GitHub/GitLab/ADO to Jira
- Jira does not send changes back to the repository
This means:
- Git remains the source of truth for code
- Jira is used for visibility and tracking
Best practices for Jira Git integration
To get the most out of the integration:
- Always include Jira work item keys in branches and commits
- Connect only relevant repositories
- Use consistent naming conventions
- Regularly verify integration status
- Use a dedicated integration account
Final thoughts
Connecting Jira with Git repository is essential for teams that want full visibility into development workflows.
With Getint’s Git Connector for Jira, you can:
- integrate Jira Cloud with GitHub, Azure DevOps, and GitLab repositories
- link smart commits, branches, and pull requests to Jira work items
- track development activity directly in Jira
Instead of relying on manual updates, teams gain a centralized, real-time view of both work and code — all within Jira.